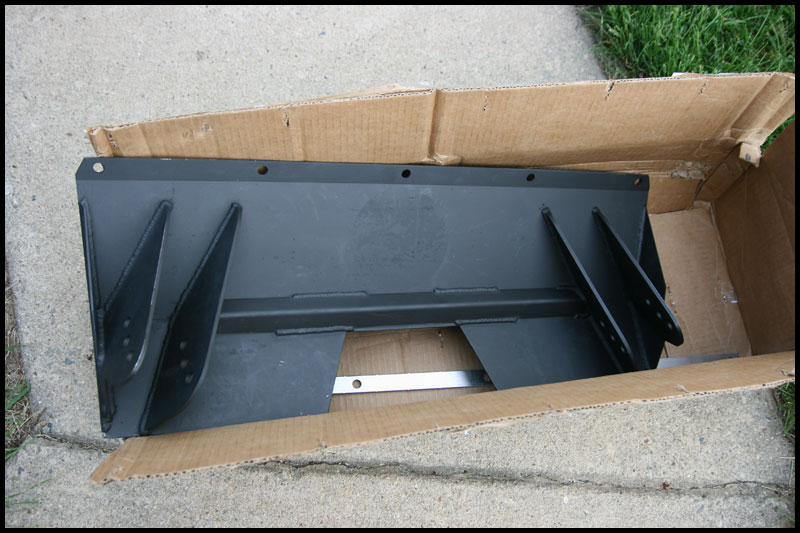
After ripping out my passengers’ side upper torque box at Atco in April 2008 it was time to get serious so I picked up the Wild Rides S-box (aka the Stang Box) to solve the problem. It’s beefy, not too difficult to install and has 3 mounting points for the upper arms.
Had I done the upper torque box reinforcements (aka battle boxes or torque box repair kits) I would have been ok but I only did the lower kit (at the time I did the lower kit no one even made a kit for the uppers). Oh well, lesson learned!
Ok, enough yapping and on with the install.
I’d recommend checking out all my pictures before reading my install instructions. This way, when I reference something, you’re familiar with what I’m talking about. (Entire gallery of pics can be found HERE)
Obviously the rear of the interior needs to be removed…this includes the seat backs, hinge brackets, the seat bottom, all the seat area insulation and the hatch area carpet. The passenger’s compartment carpet just needs to be pulled back a bit. I had towels on the front seats and used cardboard to shield welding sparks. You’ll also want to clean most of the rubbery sticky insulation stuff off so the interior plates can mount flush and be properly welded. Most of it just peels back…if not use a scraper and a head gun or blow dryer if necessary…While you’re in the interior you’ll need to remove the seat belt bolts too!
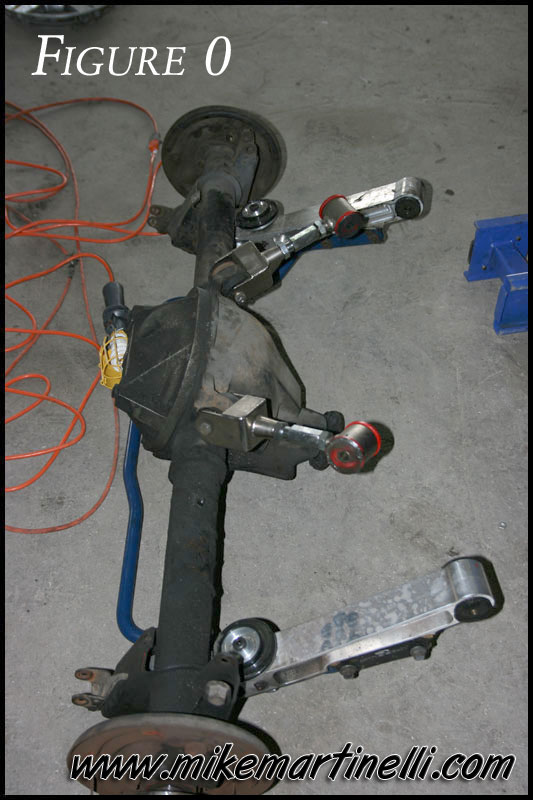
Next, you have to remove the rear. It also helps to remove the flow tubes, mufflers and tailpipes so everything is clear. I’m not going to go into a detailed rear removal tutorial but after the brake lines and emergency brake cables are clear, support the rear with a transmission jack (or whatever) and remove all the control arm bolts from the chassis (leaving the control arms with the rear – [See Figure 0]). Lower the rear out of the way and move on.
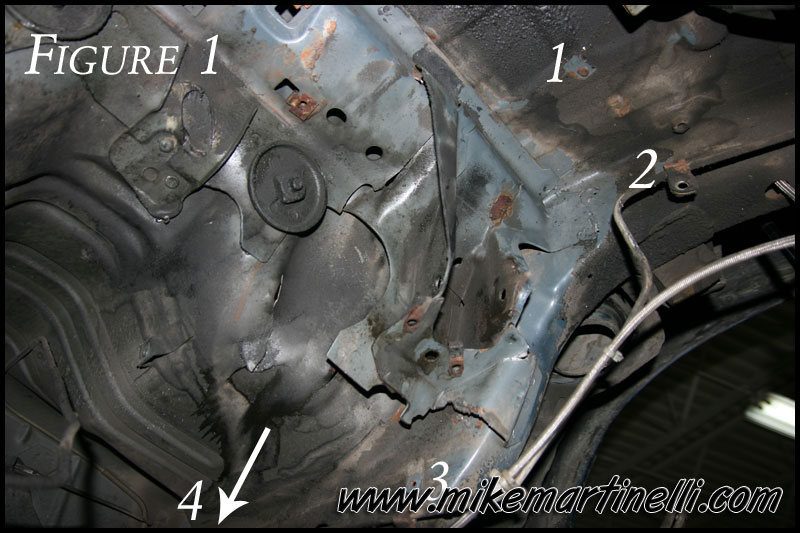
The brake lines are next. You need to remove the bracket with the “Y” and soft line and let that hang down and out of the way (NOTE: this bracket will have to be modified…more on that later). Next, you have to clear all the fuel lines. I believe there are 4 clips holding them to the car. 2 up top towards the back and 2 along the inside of the frame rail (See figure 1). Next, remove the fuel lines from the filter so they swing out of the way. Everything is very flexible and we didn’t have ANY problems clearing this area or tying anything out of the way. Be careful of dripping gas and hot drop lights. You might also want to plug the fuel lines so nothing gets in there. Once all the fuel and brake lines are out of the way it’s time to begin removing the old boxes.
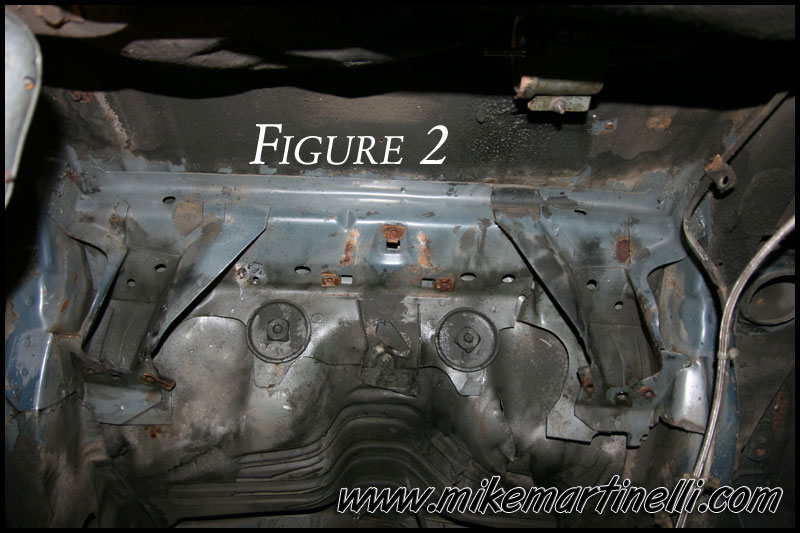
First, clean the entire area with brake clean or something similar (See figure 2). There is a lot of gunk under there and having everything clean is key. Take the time and clean it up nice…Once everything is clean you’ll be able to see all the spot welds.
I recommend drilling out the spot welds (See figures 3 & 4 for reference of some drilled spot welds) so the whole upper torque box area pops out as a unit rather than hacking them out with a sawzaw etc.
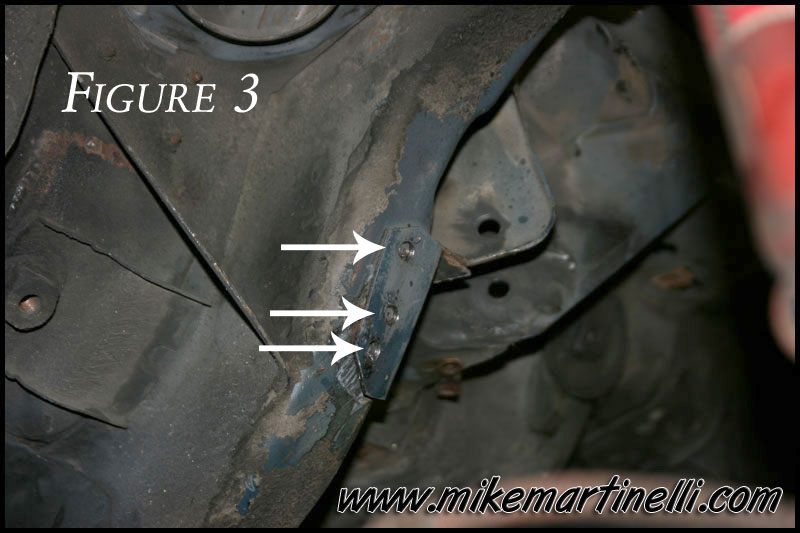
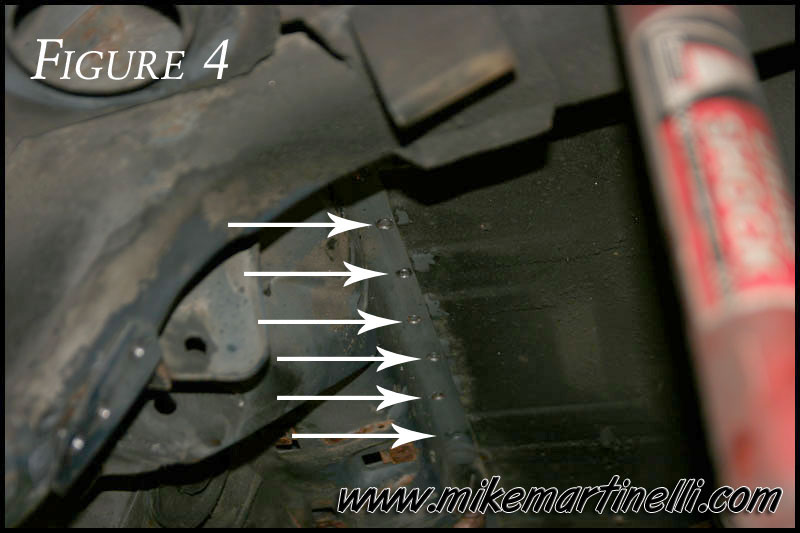
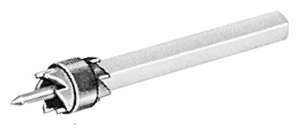
You’re going to have to grind everything smooth anyway so might as well take a few extra minutes to do it “right”. These can be drilled using spot weld cutters…There are several different types and all will work well but we used something similar to those seen in figure 4.5. As you can see these are 2 sided. I also purchased replacement cutters but we only ended up needing 2…or both sides of 1. I’d recommend getting the replacements anyway just in case you run into problems…they are cheap.
Figure 4.5
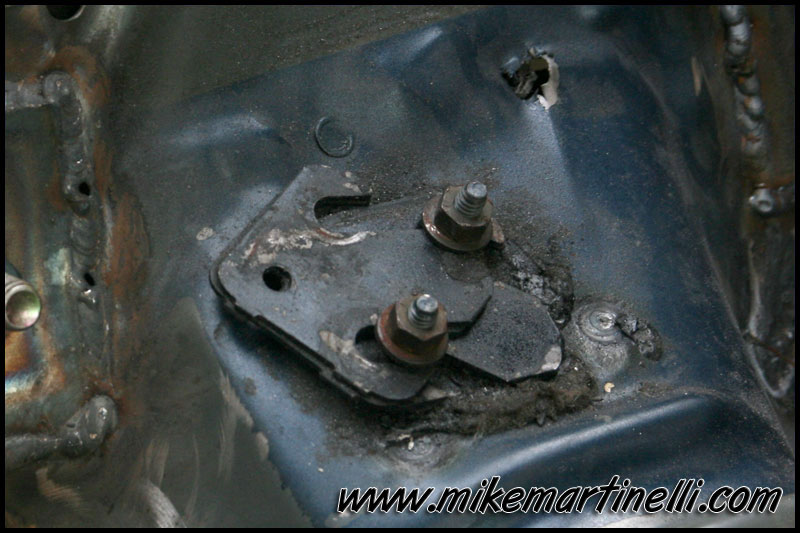
There are over 50 spot welds so be patient and get them all. Just taking an air chisel sometimes rips things out and creates more work in the end…drilling the spot welds first makes things A LOT easier. Important NOTE: If you’re going to retain your rear seat (hatchback only), the middle seat bracket needs to be gently popped out as it’s spot welded to the torque box unit (See figure 5). It also needs to be unbolted from the interior prior to removal (See figure 5.5). it needs to be modified and welded back into place…more on that later.
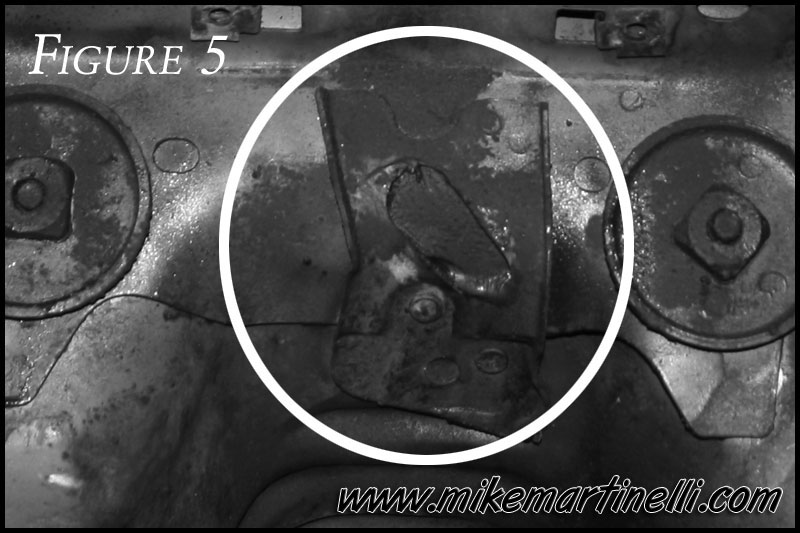
Figure 5.5
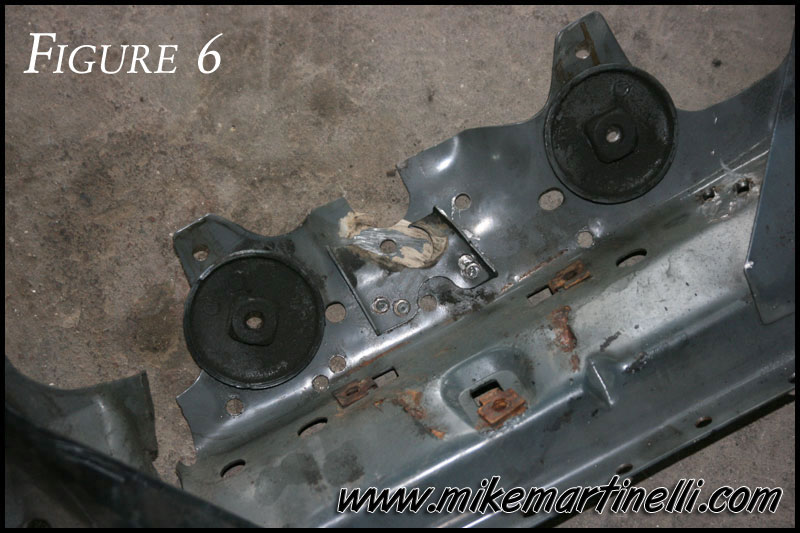
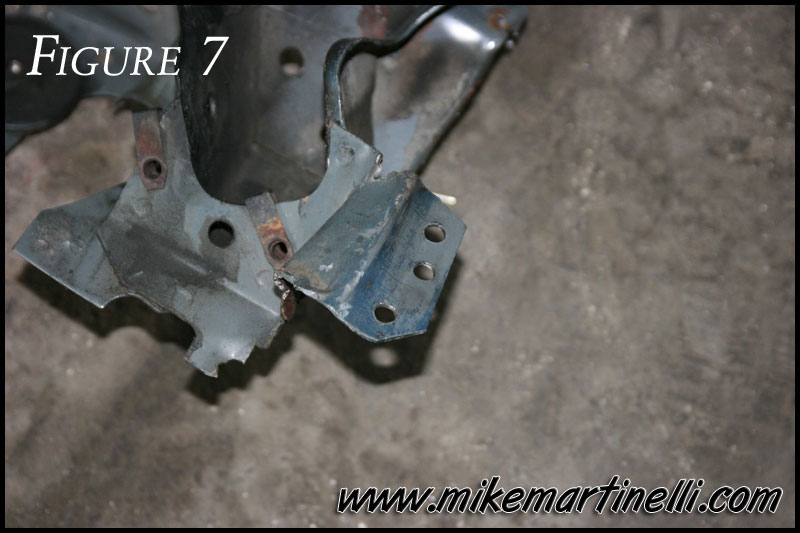
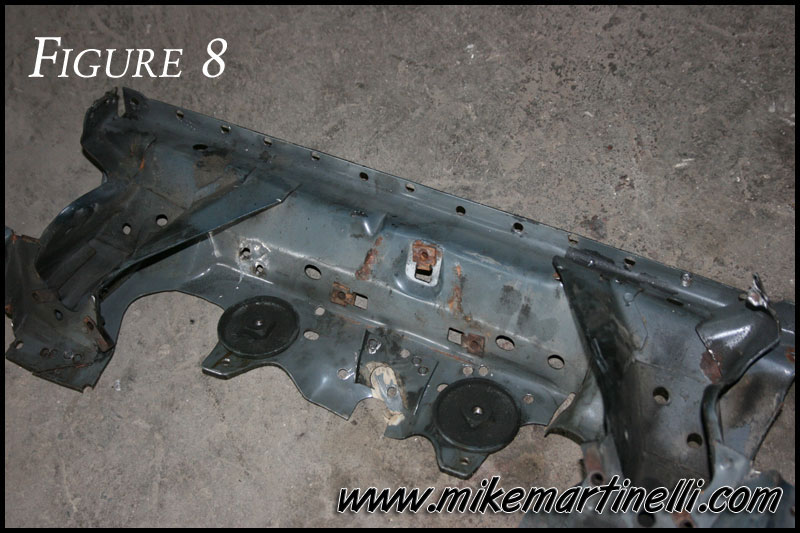
Once they are all drilled, the air chisel just pops everything free like butter. There are a couple spot welds you can’t see but once most of them are out, the whole torque box unit loosens up and you can muscle it out. We had the stock box out in less than an hour. (See figures 6, 7 & 8 for the old torque boxes removed as a unit)
Once it’s all out, clean up the area some more and grind everything around the parameter smooth as that’s “about” where the S-box will get welded. (See figure 9) Figure 9 also shows the seat belt holes and the center seat bracket mounting spot (hatchback cars only)
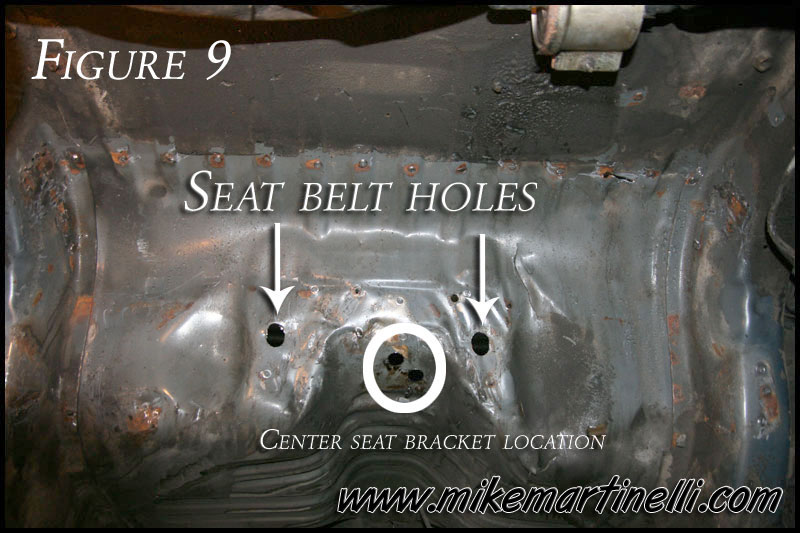
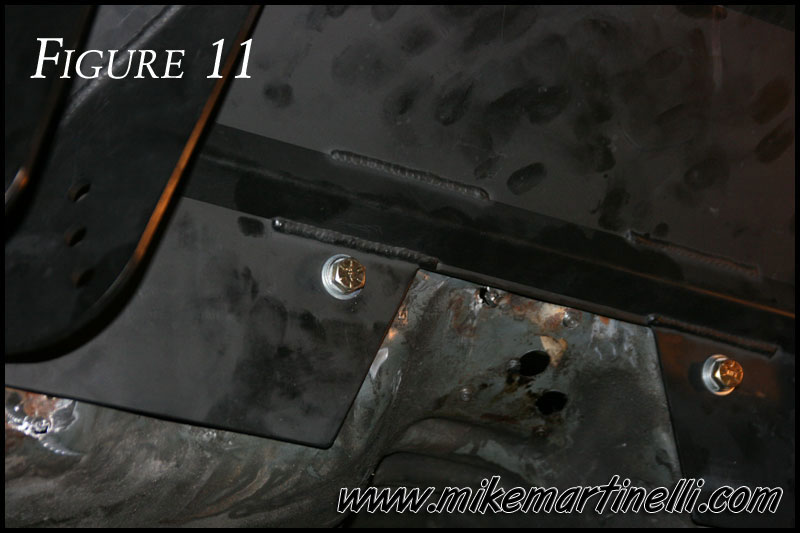
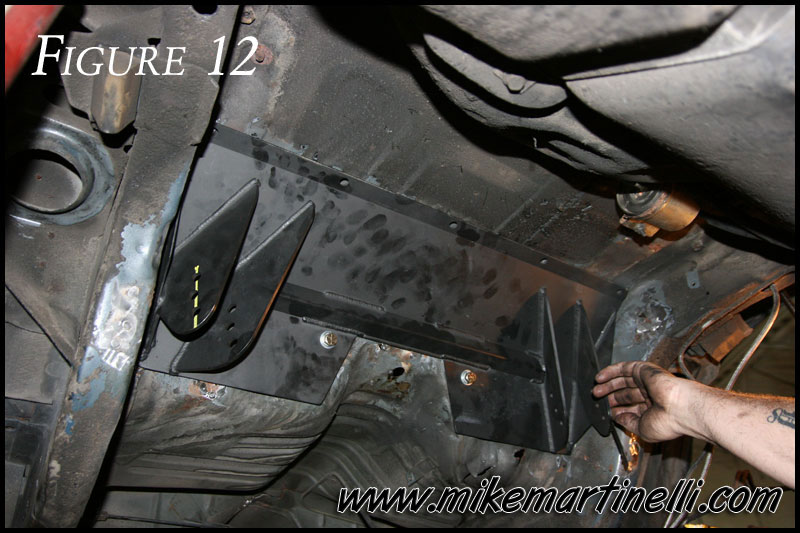
Once it’s all clean “trial” fit the S-box. Mine went right in but the Wild Rides instructions say if it doesn’t fit between the frame rails, grind it until it does. You’ll want the small top lip of the S-box to be flush with the flat part of the floor pan (or the start of the trunk area). Another good gauge for placement is that you’ll want the top of the S-box to be flush with the top of the frame rail. Imagine there was no floor pan in the car and eye up the top of the s-box with the top of the frame rail. Once you have it in the general area, have someone get in the car and mark the S-box through the inner seat belt holes. (Again See figure 9 above). Once marked, drill the S-box to match the size of the supplied hardware (7/16” bolts) (See figure 10). After it’s drilled, place it back in the car and tighten the bolts using the supplied plates with the nuts welded on them inside the car (See figures 11 & 12).

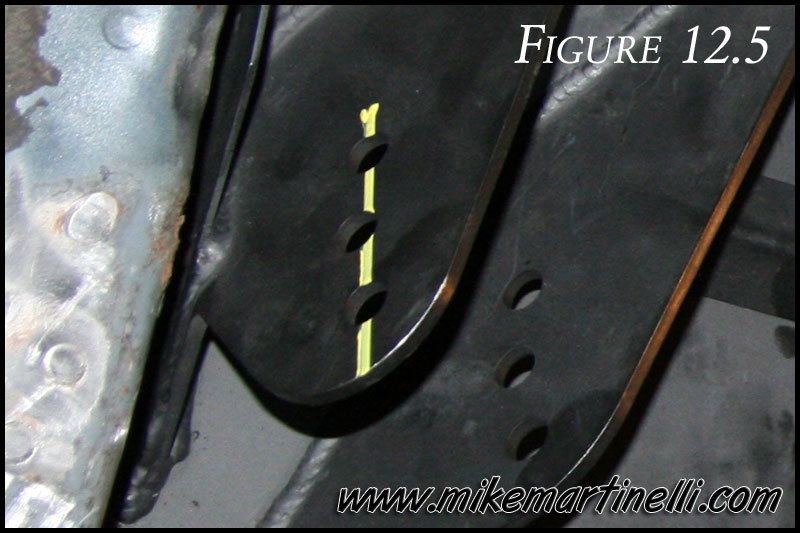
Now, the fun begins… Once it’s bolted in we have to take some measurements. We used the “Jig” holes in the rear of the frame as our rear fixed reference points. We also drew a line from the center of the upper control arm bolts on the s-box for reference (See figure 12.5). We measured from the jig holes to our center line…side to side and on the diagonal…both sides (See figure 13).

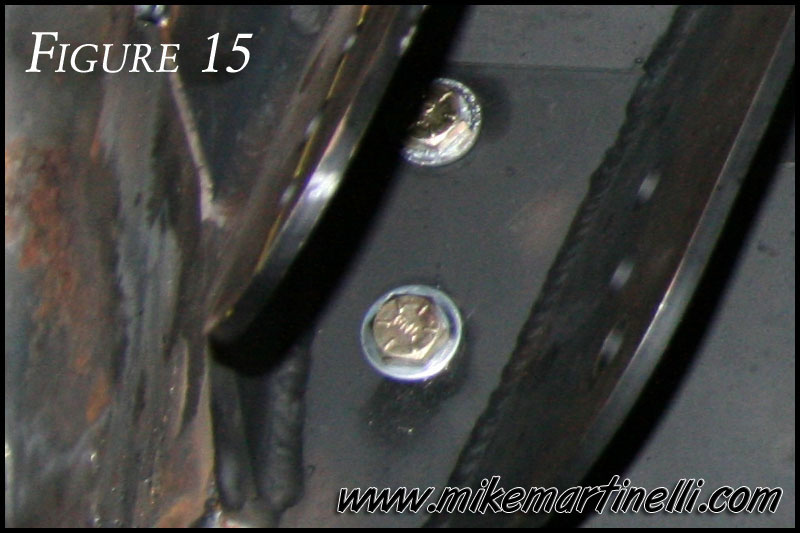
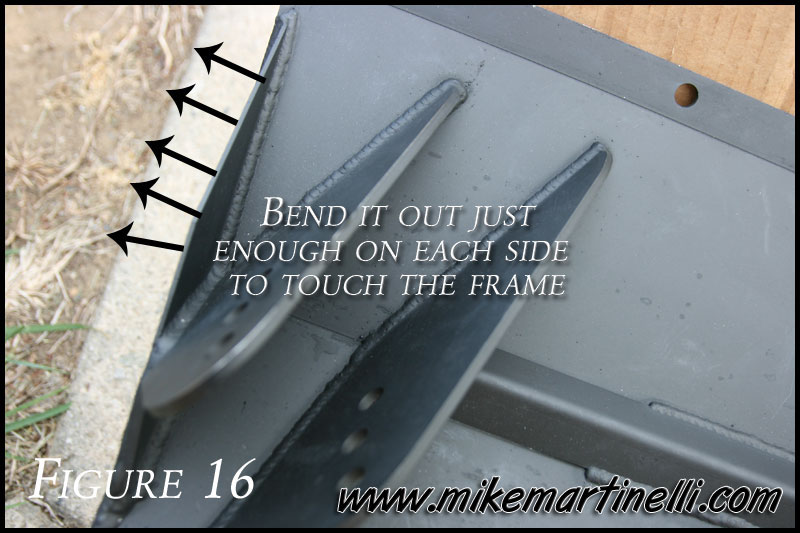
We also used the grease fitting on the front control arm as another fixed point of reference and did diagonal measurements that way. Slowly tweak the bolts until you get the S-box square using all the above references and any other measurements you want…the more the better. Once it’s square, drill all the upper holes through the floor pan. Also, drill 2 small pilot holes in each side of the upper arm mounting pockets through the floor pan (about 2” apart) (See figure 15). Once all your holes are drilled, mark the parameter of the S-box with a marker so you can clean and grind all those areas in preparation for welding. You’ll also want to mark the areas inside the car where the plates will be going so you can clean and grind those areas since you’ll need to weld the plates to the floor pan later. Remove the S-box, enlarge all the pilot holes, & finish cleaning and grinding everything smooth (inside and outside the car). You’ll also need to mark and drill the 2 larger supplied interior plates as they only come pre-drilled with one hole. NOTE: We also slightly bent the sides of the S-box out in order to be closer to the frame rails for an extra 3-4” of welding to the frame…stock, you can only weld the 4 corners to the frame…since the frame is the strongest part of the car we figured this would be even more insurance (See figure 16 for arrows indicating what we did).

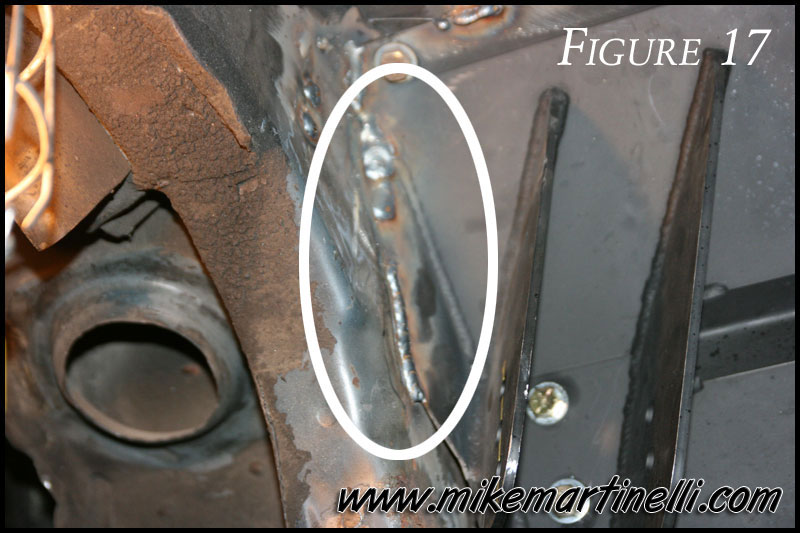
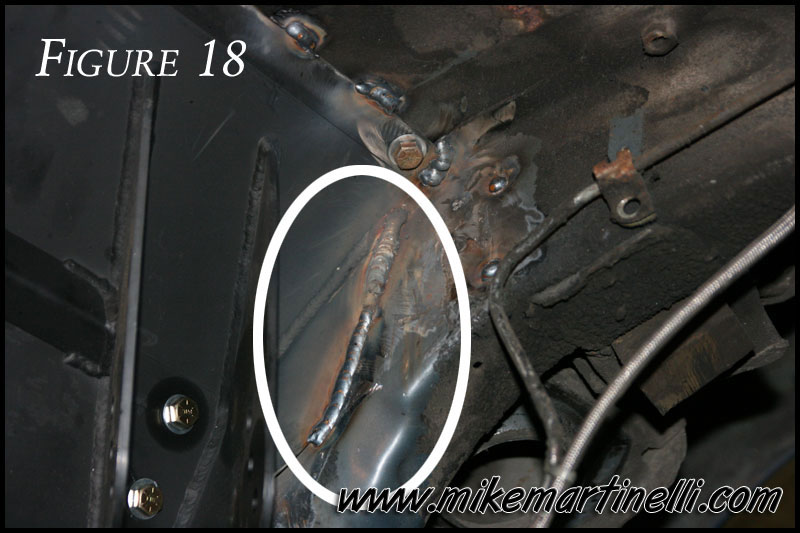
Once all your holes are drilled and everything is cleaned and grinded smooth get the S-box back in the car and bolted in place using the 5 supplied interior plates (The 2 with the nuts welded on to them, the 2 that you had to drill and the 1 long top plate). Slowly tweak all the nuts and bolts tight. Once everything is tight measure again. Tweak the bolts as needed to re-square the S-box using the above reference measurements. Once its square it’s time to begin welding. Make sure someone is inside the car looking for fires as there is a lot of flammable material inside the car. Weld the S-box to the frame first since that’s the strongest part. (See figures 17 & 18). Figures 17 and 18 show the parts we bent over referenced in Figure 16 but if you don’t do this just weld the 4 corners of the S-box that DO touch the frame. Once the frame is welded it’s time to weld across the top of the S-box.
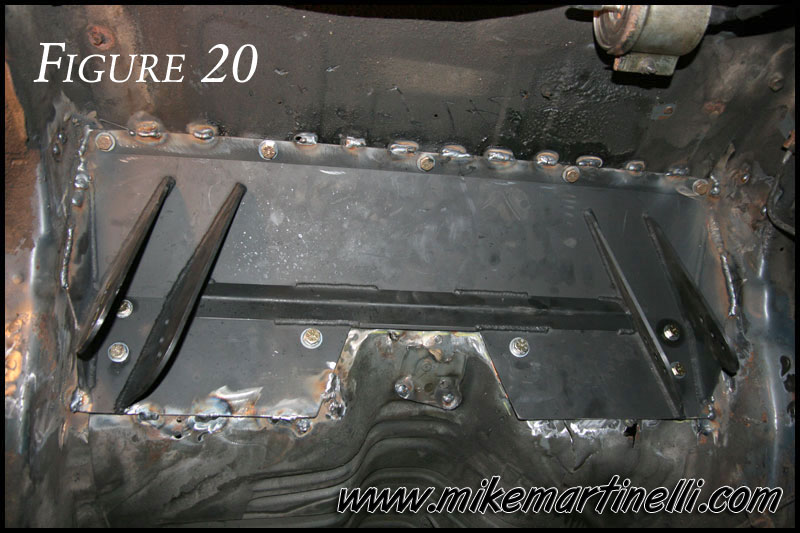
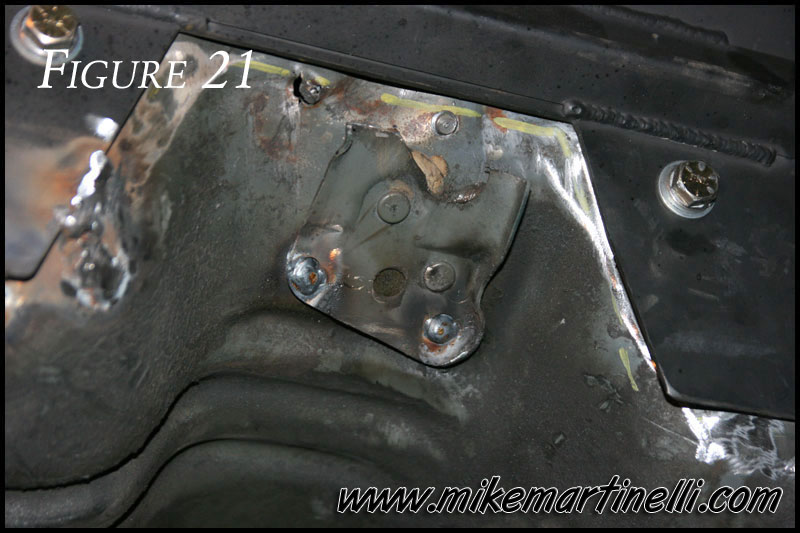
The floor pan (trunk area) has ribs so only weld the ribs touching the S-box (See figure 19). Once you get to the interior welding you’ll be able to weld the opposite ribs…so, between inside and outside the top plate will be completely solid. We even hammered the floor pan so it was closer to the lower portion of the S-box (near the tunnel) but it was very thin in that area and we kept blowing through so we only did the once side (See figure 20). At this point we also wanted to modify the center seat bracket because we wanted to retain our rear seat (hatchback cars only). You’ll need to cut this bracket in half and re-weld it to the car using the existing holes and spot welds as reference (See figure 21). Also, see Figure 5 again as this shows said bracket as mounted stock and Figure 9 which shows the holes after the stock torque boxes were removed.

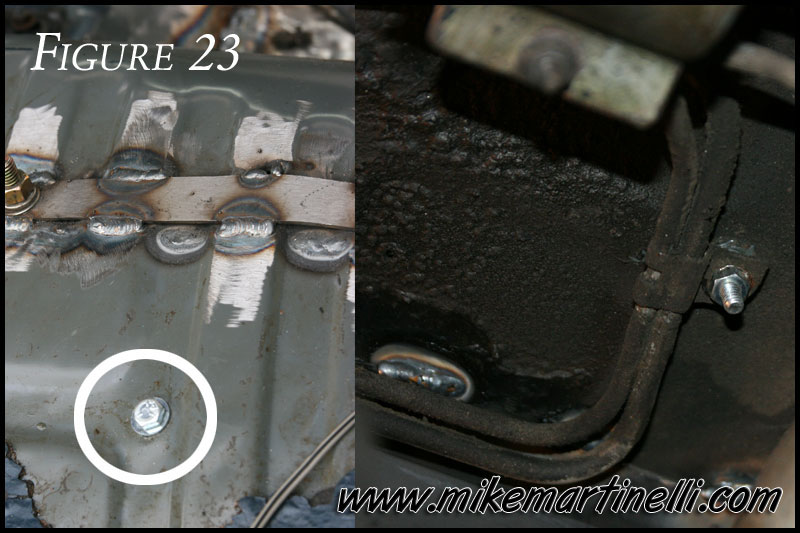
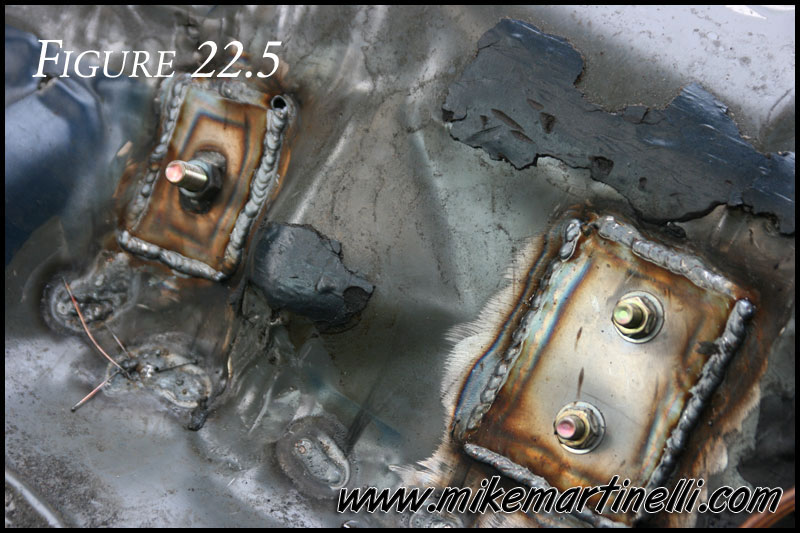
After the outside was welded we decided to put the rear back in the car before welding the interior…but it’s your choice. NOTE: there are a couple other things that need to be modified underneath. The bracket holding the brake line “Y” and the soft line need to be mounted somehow since it was originally mounted to the stock torque box. We simply welded a bolt to the S-box and used that as a stud along with a nut to secure the bracket. We waited ‘til everything was back in the car to mount this bracket to make sure it was in the correct position (See figure 22). We also had to modify the top fuel line clip because when secured the line was touching one of the top S-box bolts. I didn’t want it to chaff so we simply pulled out the stock rivet and replaced it with a bolt. We used a nut as a spacer and another nut to hold the fuel line in place (See figure 23).
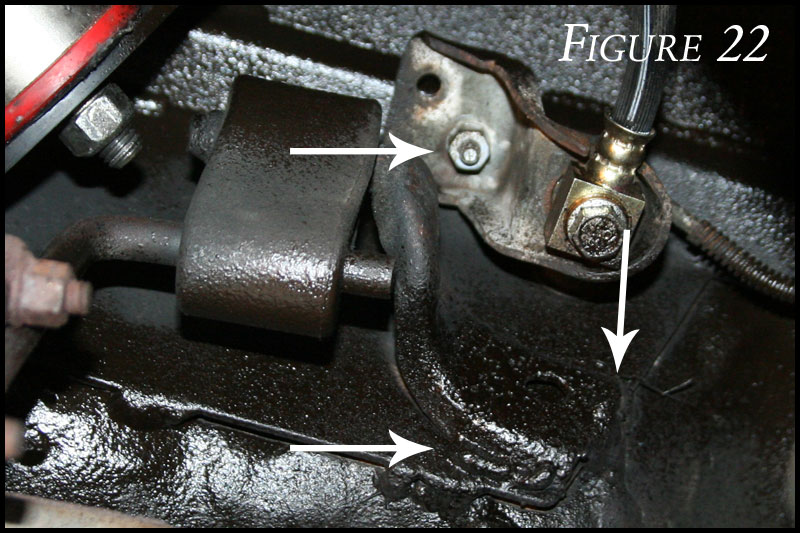
You also have to modify the stock exhaust hangers since they originally mounted to the stock torque box. This was fairly easy too. Once the exhaust is tightened at the flow tubes and the tail pipes are in their hanger mock up the hanger to be modified. We simply cut off the excess and welded it to the corner of the S-box (See figure 22 again). The stock snubber will need to be modified too if you elect to re-use it…however, I just left it off so I don’t have a “fix” for that.
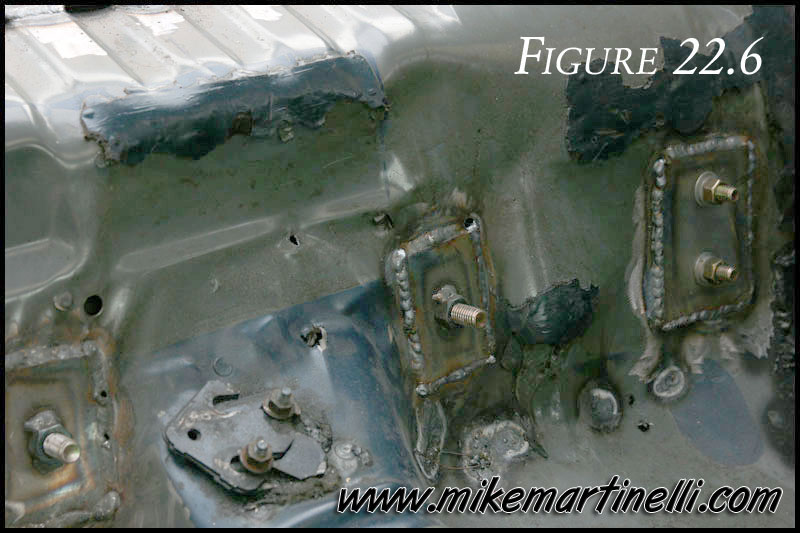
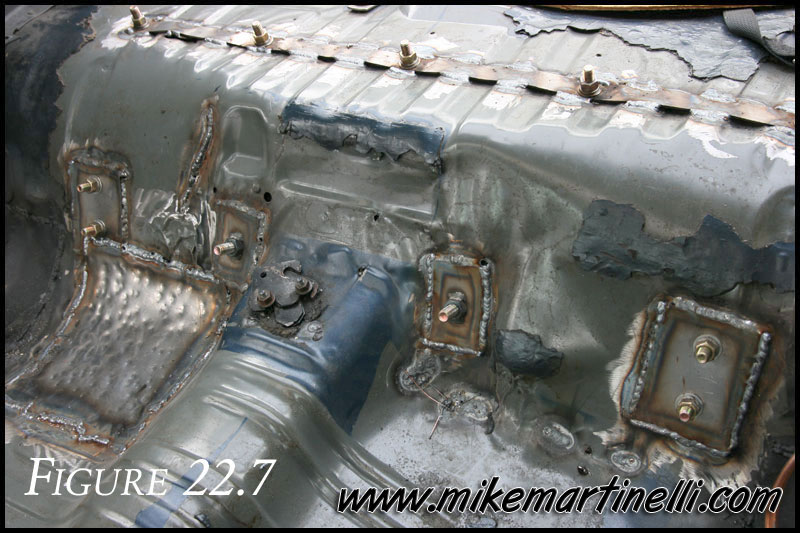
The interior welding is simple. Just weld all the plates to the floor pan (See figures 22.5, 22.6 & 22.7).
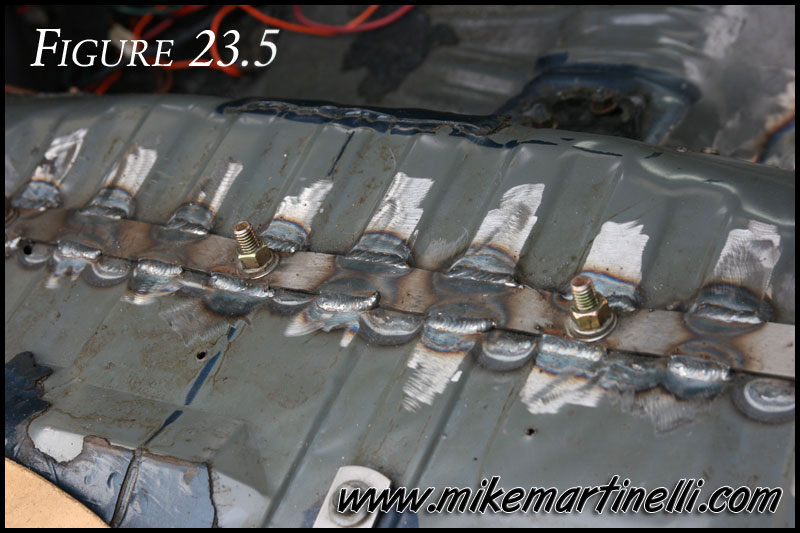
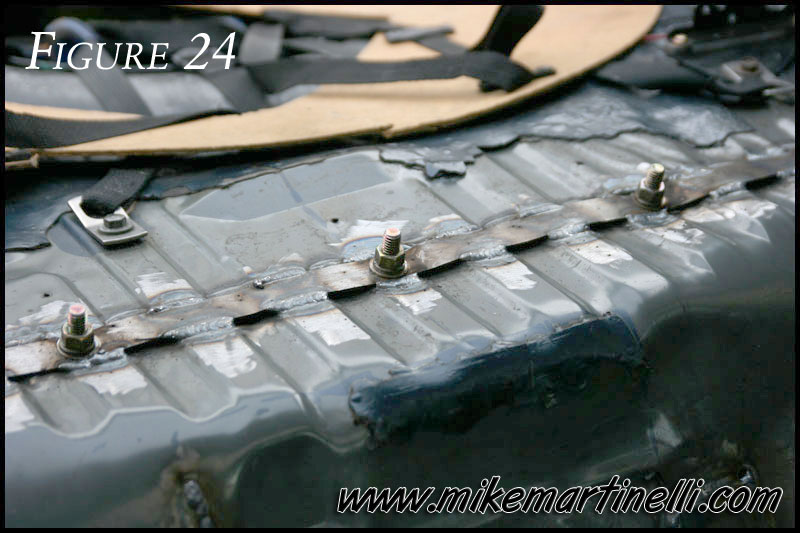
For the long top bar, again just weld the ribs that touch the plate as the “other” ribs are already welded underneath the car (See figures 23.5 & 24).
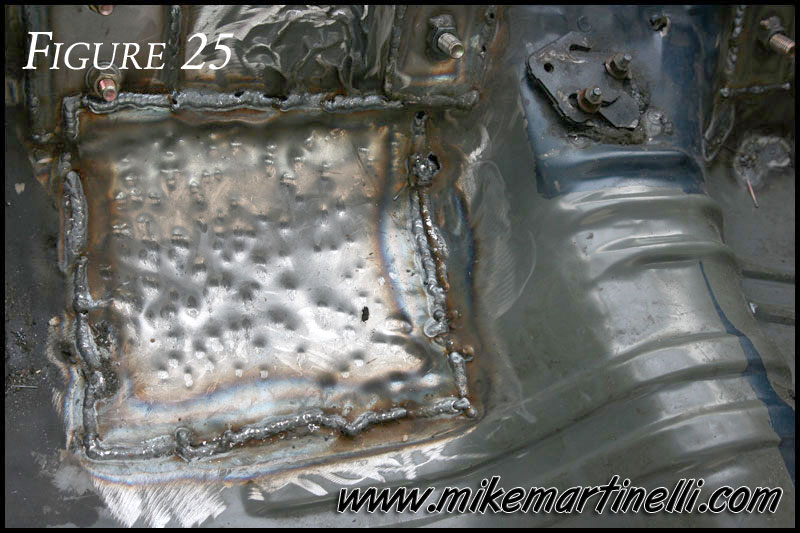
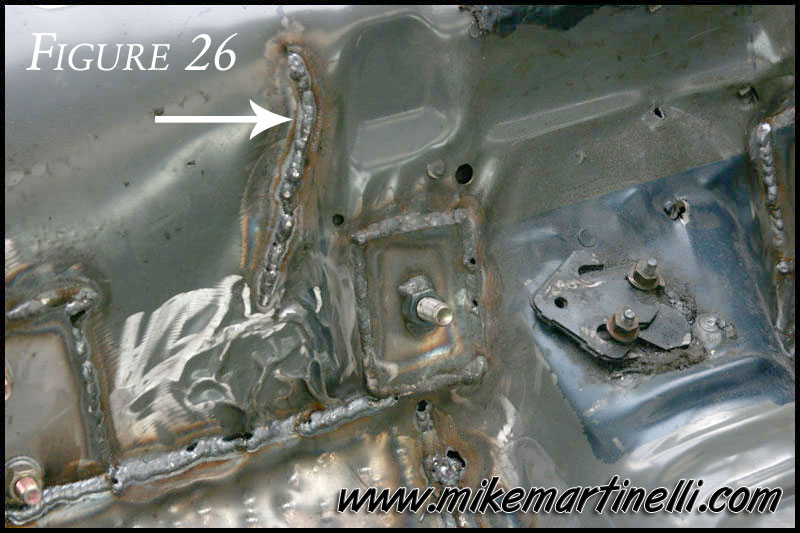
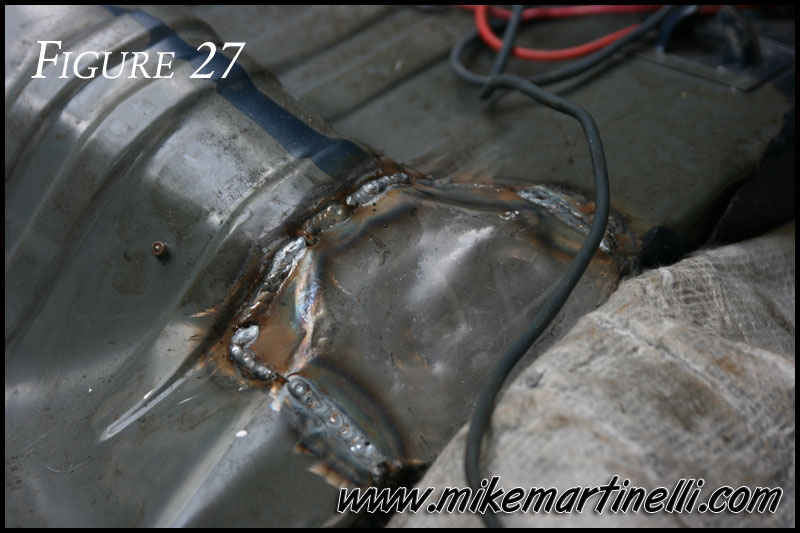
You’ll also notice the 2 patch panels I made. The large square one repairs holes from where the torque box ripped out of the floor pan (See figure 25). There was also another rip that I just ran a bead across (See figure 26). The other patch area is where the tunnel meets the bottom seat area. This is a common Fox body rip point and has actually been ripped for a long time. I figured since I had everything apart it was time to fix it (See figure 27). I simply cut a large panel to fit each area. I welded it in down in 1” sections hammering it down, forming it to the area, as I went along.
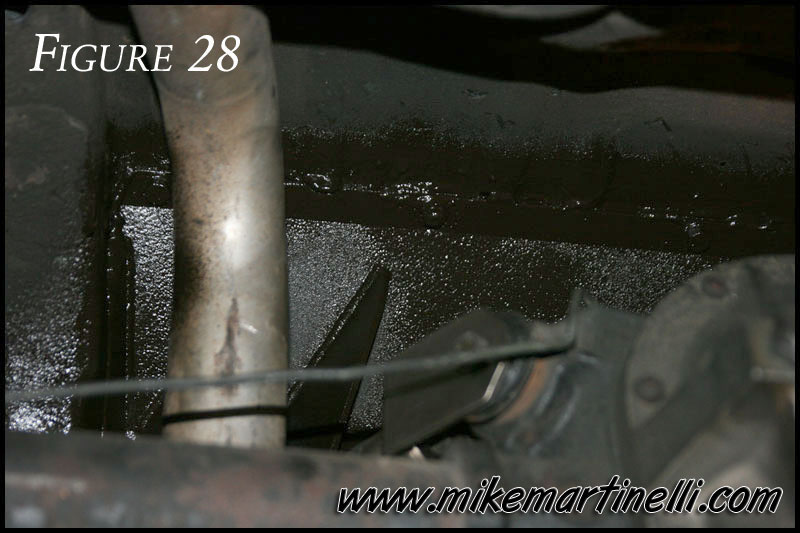
Once everything was welded I painted it to prevent rust. I waited ‘til after I welded the inside to paint the underside…For the underside I used undercoating (See figure 28).
Figure 28
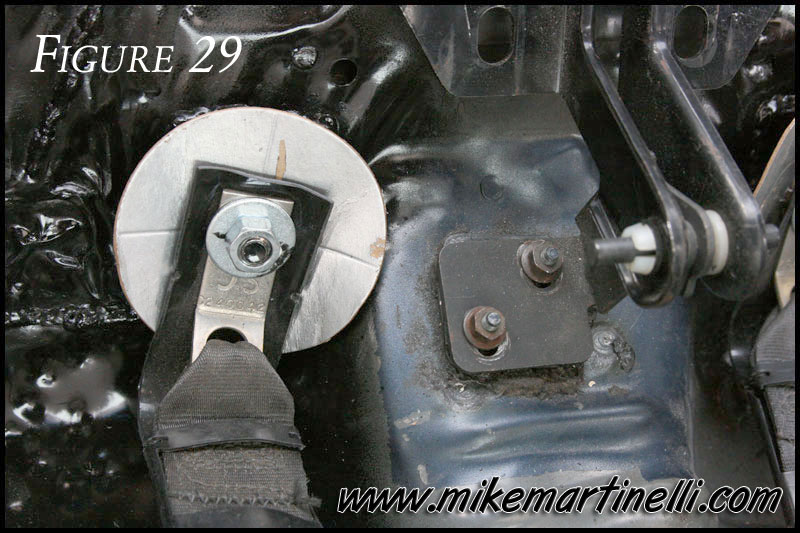
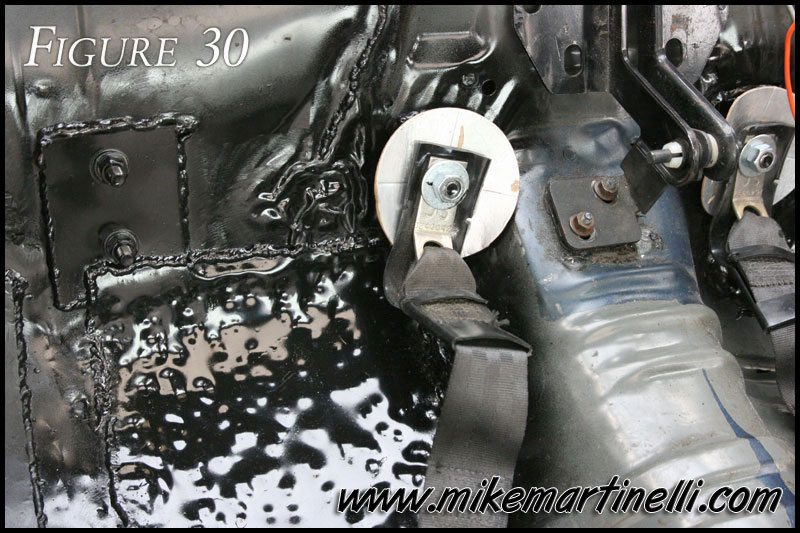
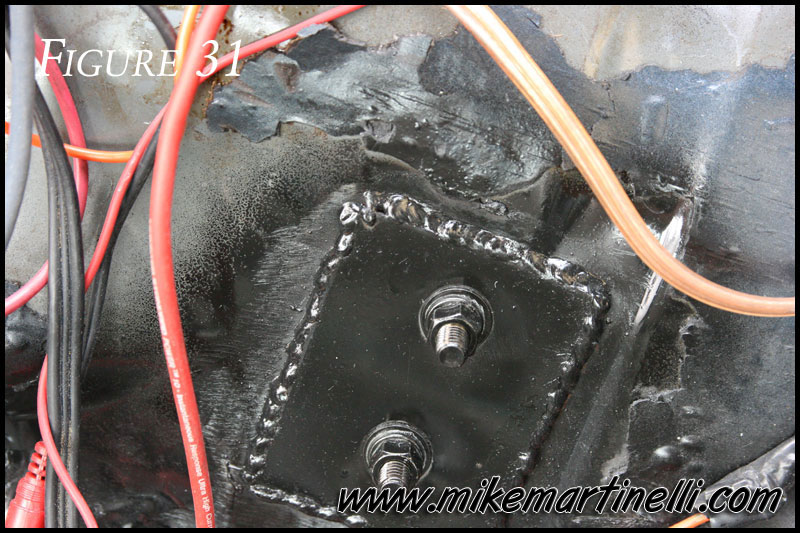
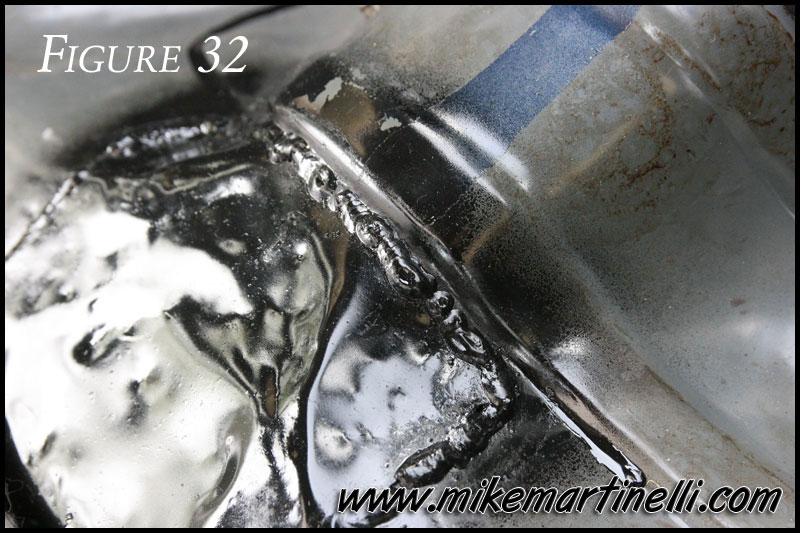
For the inside I just used black paint. You can also see the seat bracket back in place along with the seat belts (See figures 29-32). The supplied bolts are long enough to use as seat belt studs…you’ll just need a 7/16” nut for each. The interior fits back in place with NO problems and the whole job is invisible!
In Conclusion:
Overall we spend about 14 hours doing the whole job. Note, this also included a complete rear brake job (shoes, springs and wheel cylinders) and about 3 hours welding in those 2 patch panels…so maybe 9 or 10 total hours doing the S-box. Not too bad and no major issues.
I hope this helps as I didn’t find anything on the web. The Wild Ride instructions are “ok” but the pictures SUCKED so I wanted to document the job to help others. If you need any other help CONTACT me with questions and I’ll do my best to help out.
1 comments on “Wild Rides S-box Installation”