Summer 2011 I blew the turbo to manifold gasket and developed a nasty exhaust leak. It sounded horrible and performance was suffering. I originally planned to do it over the winter so I wouldn’t have any downtime but I didn’t end up getting to it until spring 2012…BUT, the entire task wasn’t nearly as hard as I thought it was going to be and the car was only down a couple days so I didn’t miss any cruise time.
Here is a vid of the exhaust leak. I rigged up my shop vac hose in place of the intercooler so I could get a closer look at things underneath…it worked perfectly because I was able to see (and hear) exactly where the leak was coming from:
I did find some info online giving small details on the best way to do it but I was still basically going in “blind”. I figured I’d document it for others’ wanting to perform this task.
I knew I wanted to remove the turbo/manifold together as an assembly because the flange bolts looked impossible to get to. But, I needed to figure out the best way to actually go about doing it. I talked to my SVO expert JTurbo over at FEP and he gave me some great pointers…Thanks again Joe!
The first thing you need to do is to get under the car and remove the downpipe (DP). I didn’t originally do this because I didn’t think it would be in the way…but it was. I did end up removing it for re-assembly and it makes a big difference. It’s fairly easy to do but you’ll need a long extension, a swivel and a deep dish socket to remove the bolts from the wastegate flange. My car already had an aftermarket downpipe on it (with a cat welded in) so once I removed the bolts at the wastegate I just had remove the exhaust clamp from the other end of the DP and it slipped off. Not sure what the stock setup looks like but soaking the bolts, clamps and connections in PB Blaster (or similar) certainly can’t hurt. Air tools work wonders too.
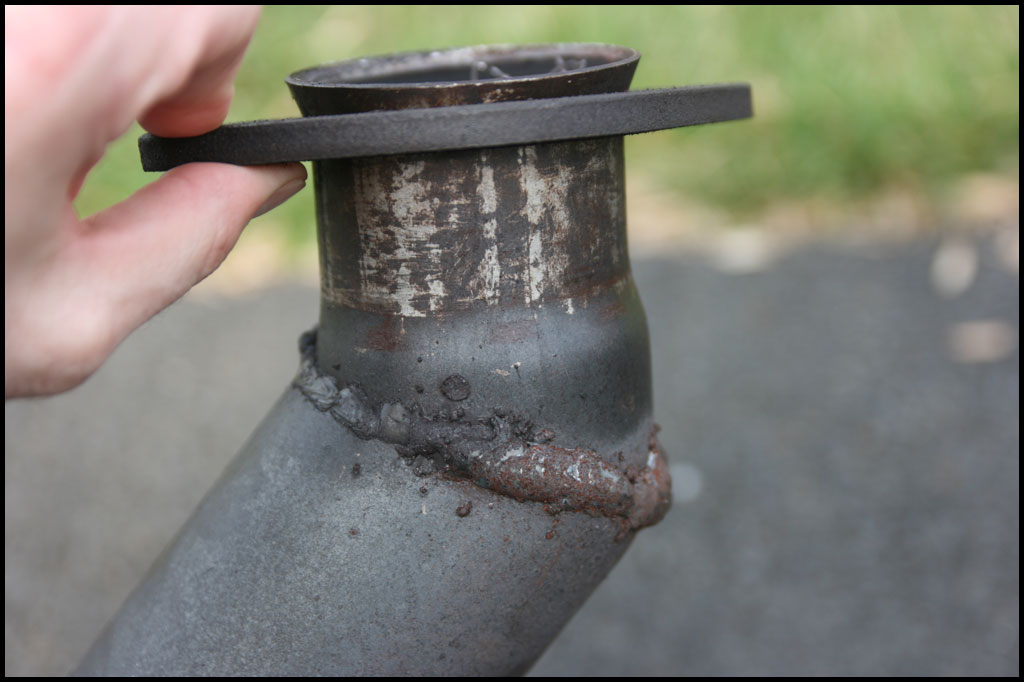
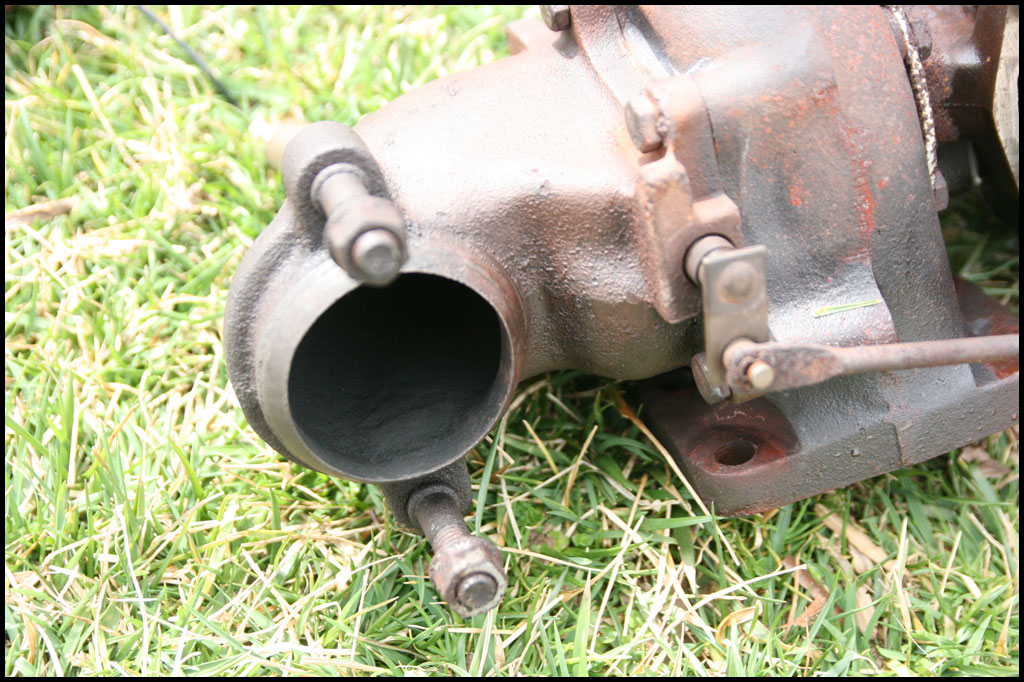
Here is the DP removed – you can see the cat is welded right to it. The previous owners used old crappy exhaust clamps which sort of dig into the pipes making them hard to slip from each other…I eventually got them apart but replaced that crappy clamp with a nice band clamp. They are awesome and don’t kink the pipes.
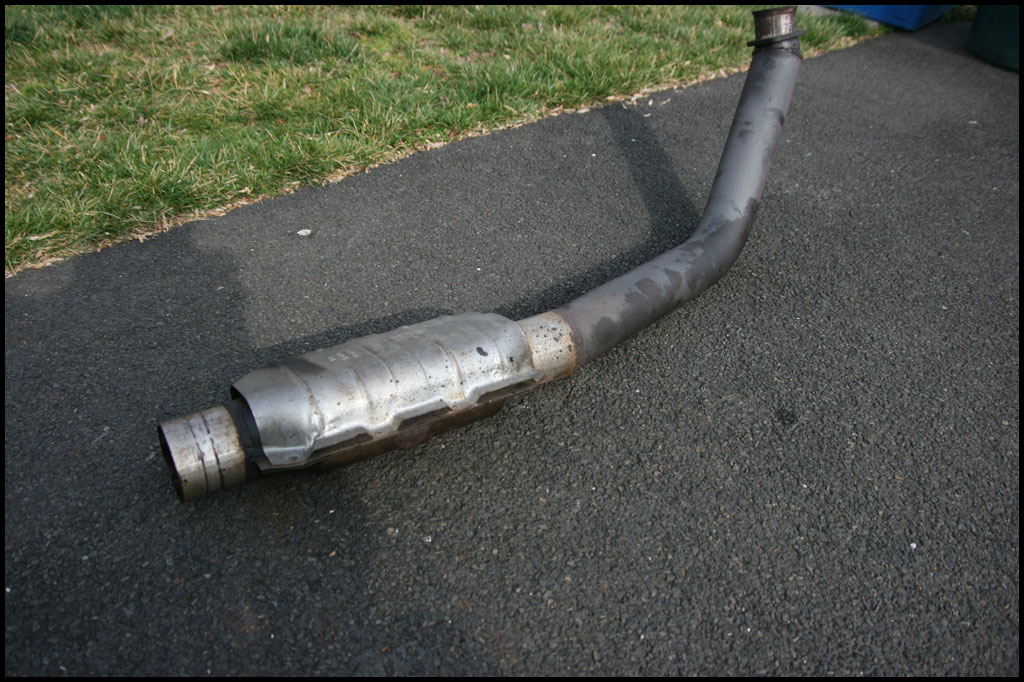
It’s definitely a little funky looking at this end but actually not too bad…all the aftermarket DP’s for the 2.3T’s neck down a bit at the end so I wasn’t too concerned about performance suffering…
Once the DP is removed you’ll want to drain the coolant. I didn’t do this first either and ended up making a mess of my driveway. I’d recommend doing this from under the car as well. Right from the coolant return line that goes from the turbo into the block – since this is the lowest part of things you’ll need to remove you’ll be good to go. Be careful though as it will squirt out really far once you remove that line…make sure you have something to divert the coolant into your container.
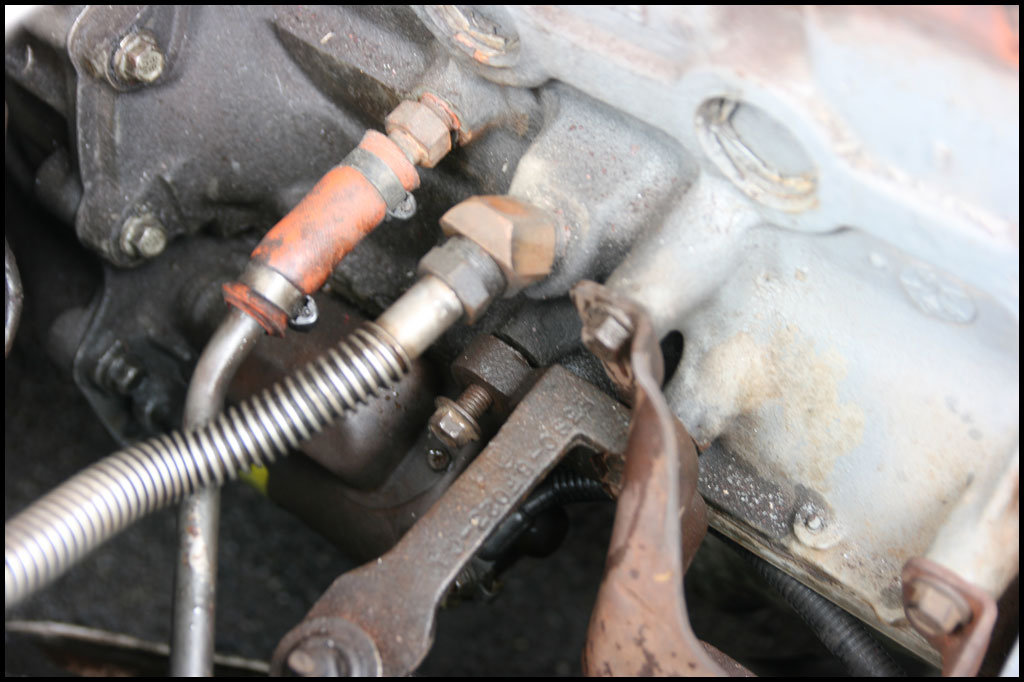
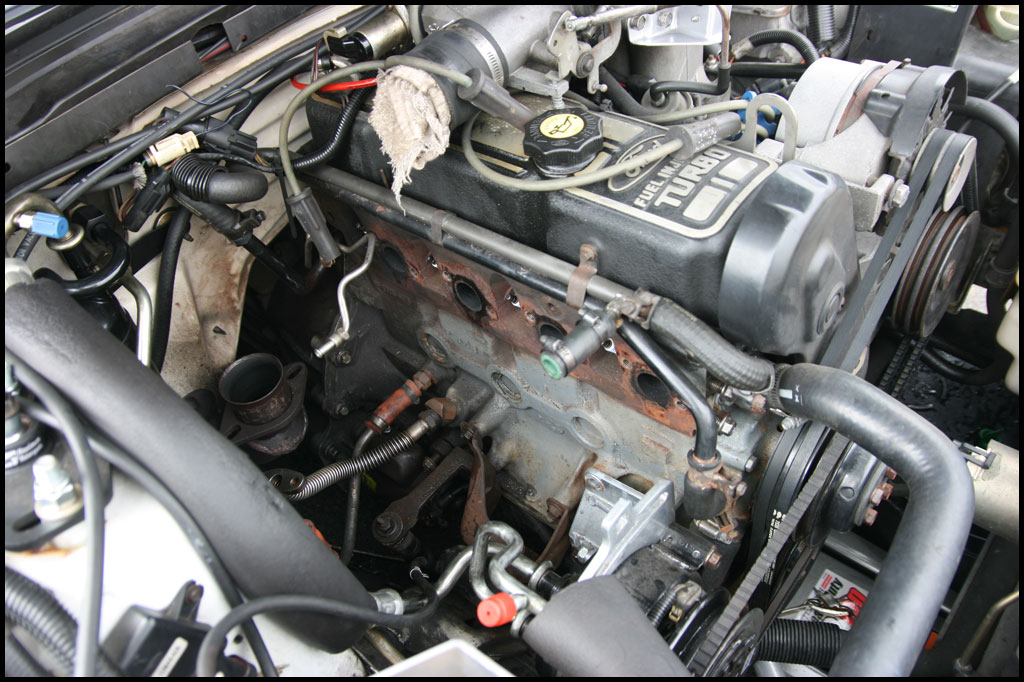
You can see the coolant return line enter the block in this pic (it’s the line on the left with the rubber hose on the end – next to it is the oil return line (flexible looking line). You can always drain from the radiator but I thought this would be easier.
Assuming the intercooler is already off the car, you’ll want to now remove the upper coolant feed line – one end comes directly off the main coolant feed pipe running along the valve cover and the other end going into the turbo. Be careful again because there will probably be a little bit of coolant still in the line…so have some rags handy.
Next you’ll want to remove the oil feed support bracket from the 1st manifold stud (closest to the firewall). After you remove this – remove the other end from the turbo – be careful as these fittings tend to strip…I didn’t have any problems though.
You can see the support bracket nut here:
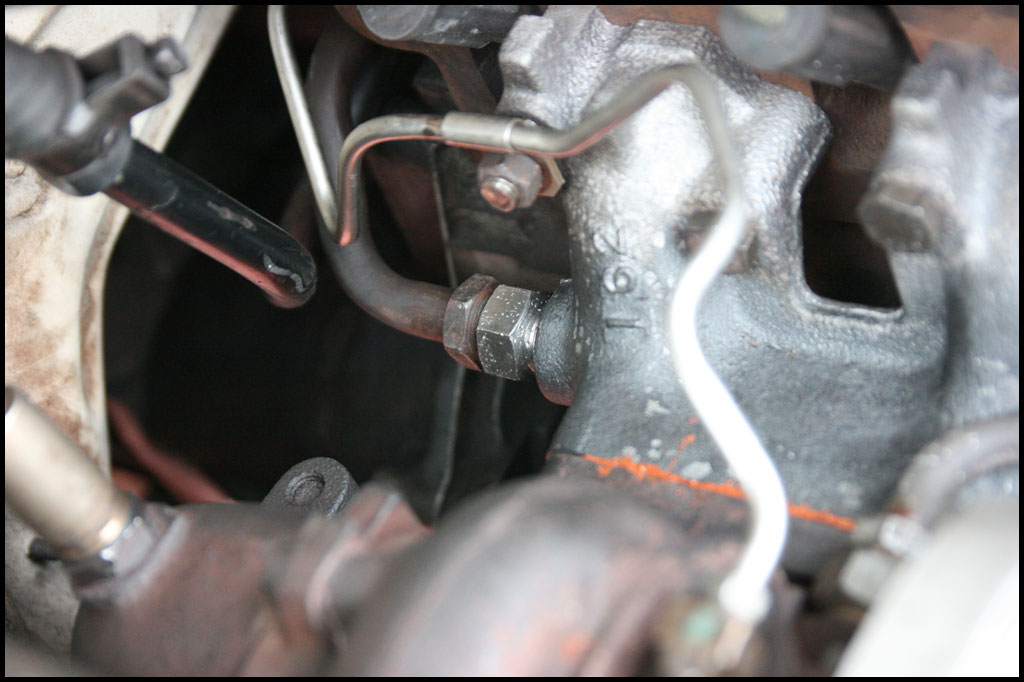
…And this is the fitting the hard line goes into. The hard line is a bit flexible and you’ll be able to swing it out of the way but still be careful.
You’ll also want to make sure you disconnect the Oxygen Sensor (O2 sensor) plug. I couldn’t get mine apart so I just cut the wire…I hated doing it but I didn’t want to break the connector. Wasn’t a big deal – I soldered it back together and it’s good as new.
You can also pull off the plug wires, remove the intake pipe from the turbo inlet, disconnect the turbo ground wire and remove any vacuum lines in the way. I have an aftermarket adjustable boost valve so I only had to remove the one from the wastegate actuator. (seen below)
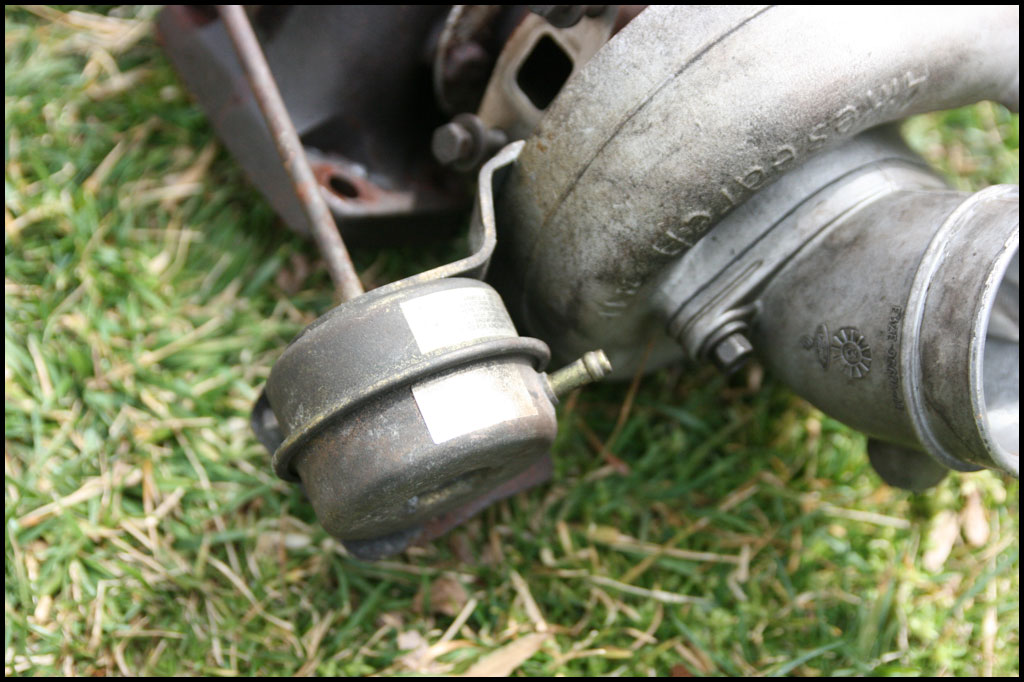
Make sure to securely route the plug wires and the turbo ground wire out of the way making sure they don’t fall back in your way…you don’t want them to snag on the turbo as your removing it. It’s also a good idea to go over all vacuum lines to make sure they won’t get in the way either.
At this point you’ll want to remove the EGR connection at the back of the manifold (nearest the firewall) – also seen in pic above of oil line support bracket. I had trouble with this one – I even had it soaking in PB blaster overnight…I also used heat but I just couldn’t break it loose. I didn’t want to waste any more time fiddling with it so I ended up just cutting it off. Forced 4 has them new for less than $40 so I knew if I couldn’t find a used one I’d only be out $40. (I did end up getting one used so I was good to go)
The last thing you’ll need to do is to remove the AC Brackets. There will be 3 overall – one adjustment bracket and two support brackets. They are simple to remove.
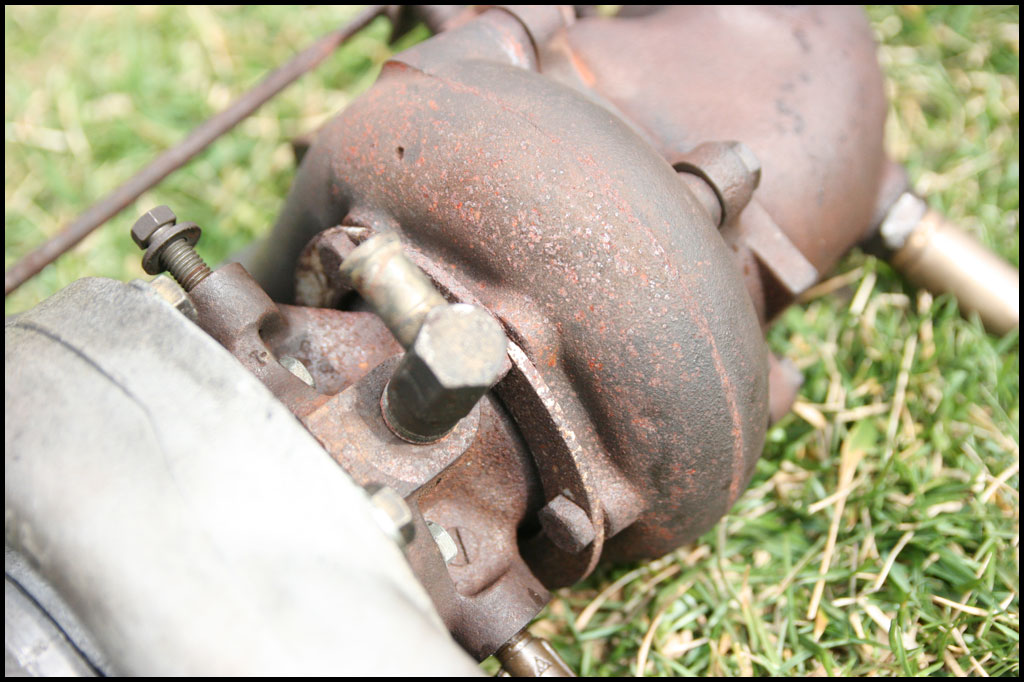
Now it’s back under the car to mess with the “V” shaped turbo support bracket and the oil return line going into the block. This is where things get tricky. I got lucky and the 2 lower turbo flange nuts were loose (thus causing the gasket blowout and leak) and I was able to get them, and the support bracket, off from underneath, later allowing me to lift the turbo/manifold assembly out of the car.
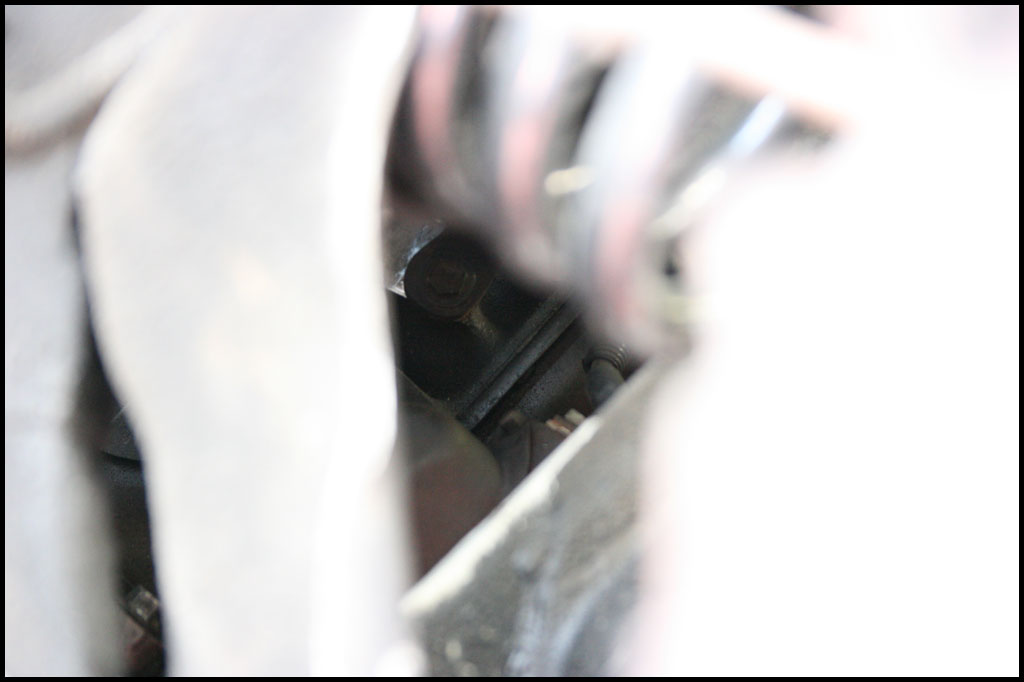
However, getting a wrench on these nuts is a total pain and if they aren’t loose it’s going to be a nightmare so you’ll want to try to remove the oil drain line going into the block and then the bottom bolt of the support bracket…I ended up using a shorty 7/8″ open ended wrench to get the oil drain line back on and it worked very well going around the support bracket. If you take the right front wheel off, you can see through the K-member and with a long extension you can get the lower support bracket bolt out…it was easy.
In the pic below you can see the bolt through the k-member…
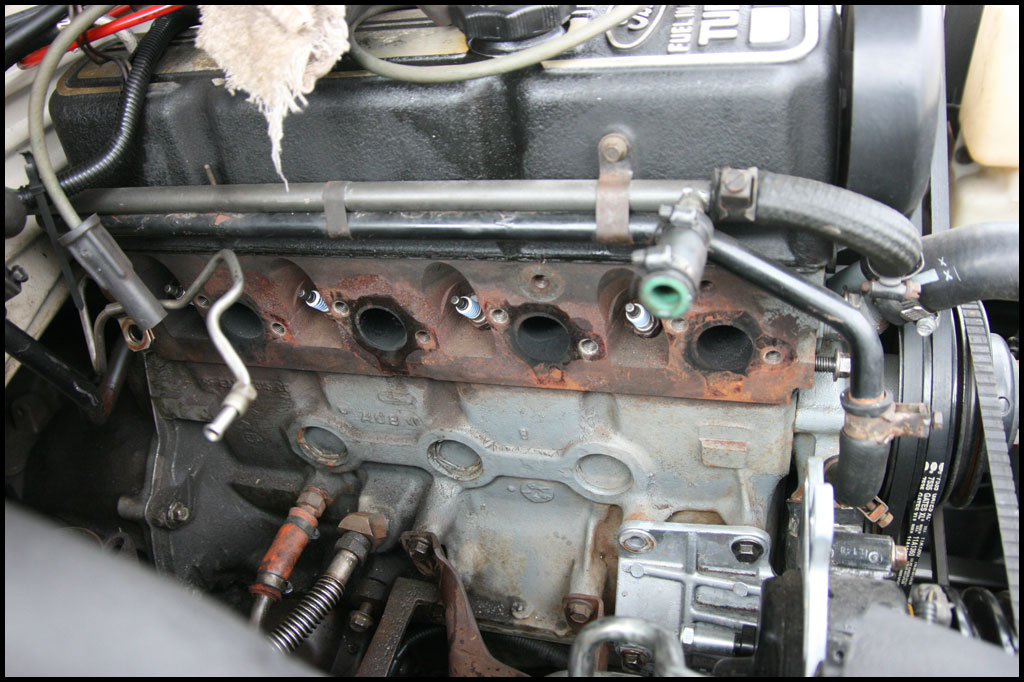
With everything off below, it’s time to start removing the manifold bolts…with a combination of wrenches and deep dish sockets they came out easily for me. I kept them in the order they came out so I could put them back in the same spots – but that’s just me being weird I think…although if your still using the intercooler support bracket there are a few that will have to go back in the same spots so make sure to take note. I’m using heavy duty intercooler hoses so I’m not using the intercooler support brackets anymore so I even cut the studs off 3 of the 4 manifold bolts – makes getting a socket on them much easier…I did leave the stud on the first bolt so I could re-mount the oil feed line securely.
With the manifold bolts out you should be ready to lift the assembly out…Make sure it’s loose and fully away from the head. Also give a once over to make sure nothing else is in the way. It’s also nice to have a second set of hands to help take some weight and to move the oil feel line out of the way. Carefully lift the assembly out of the car being careful to not get hung up on coolant or AC lines that are in the way. It’s a bit tricky but it does come out.
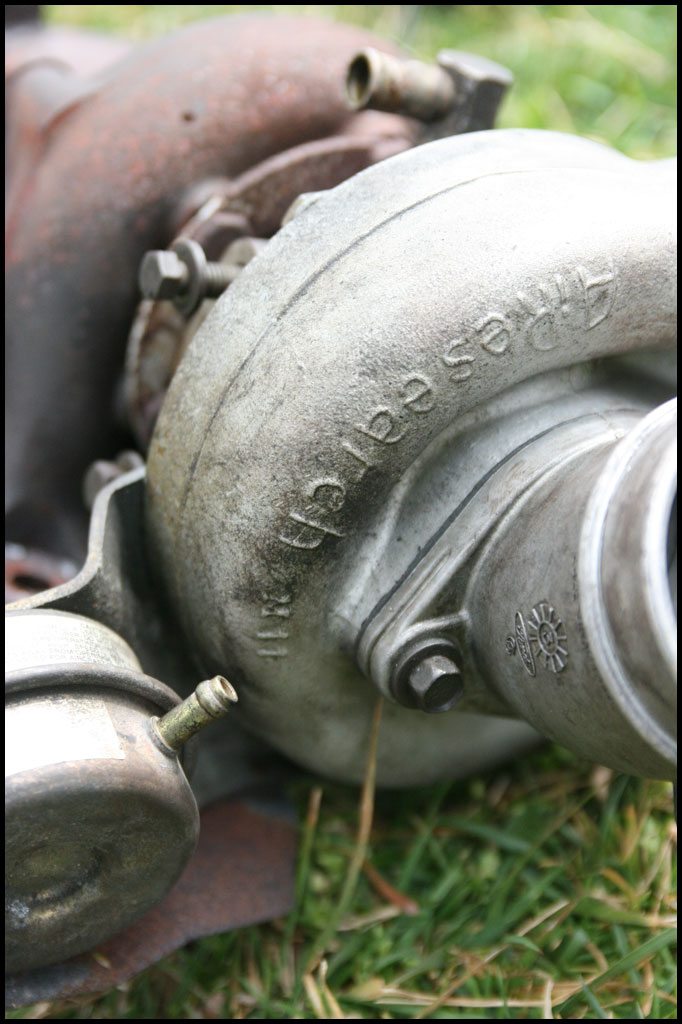
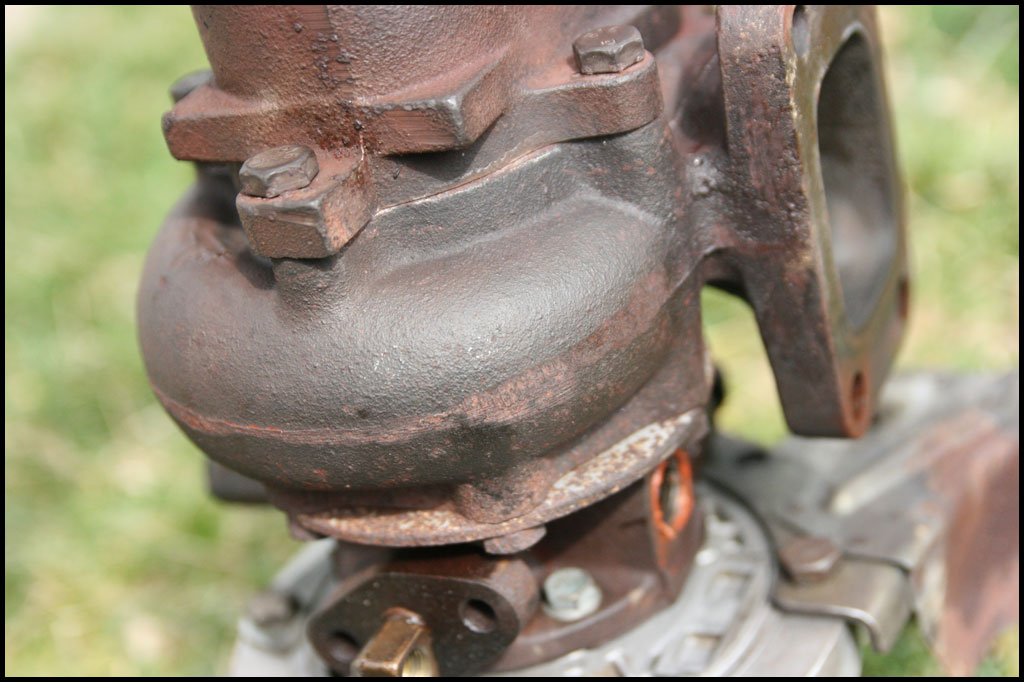
Below are a bunch of pics of the assembly after I got it out of the car:
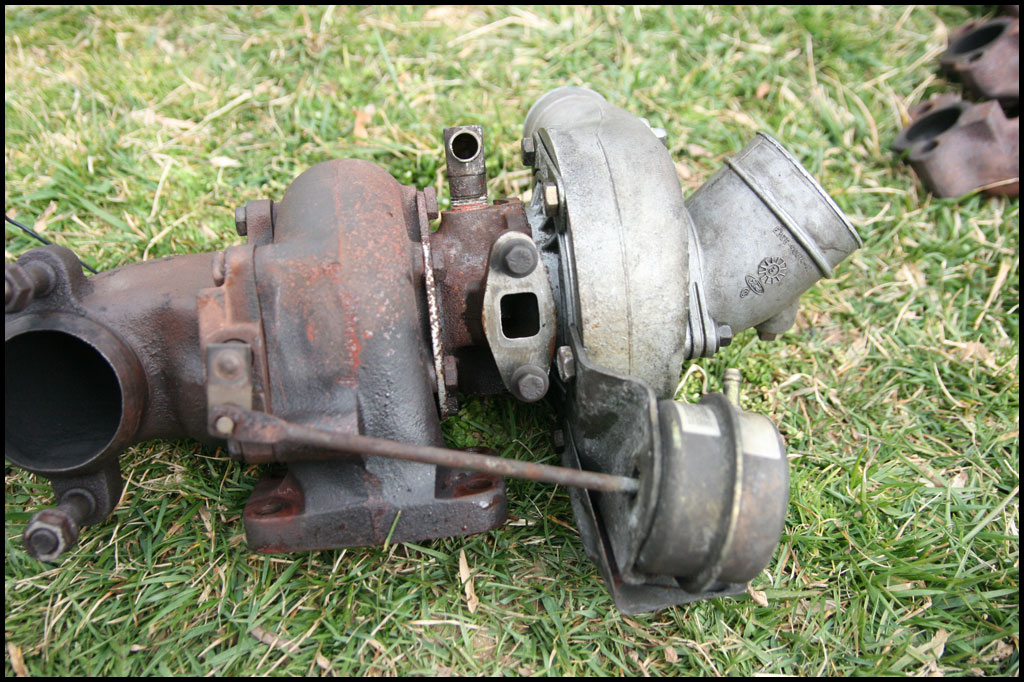
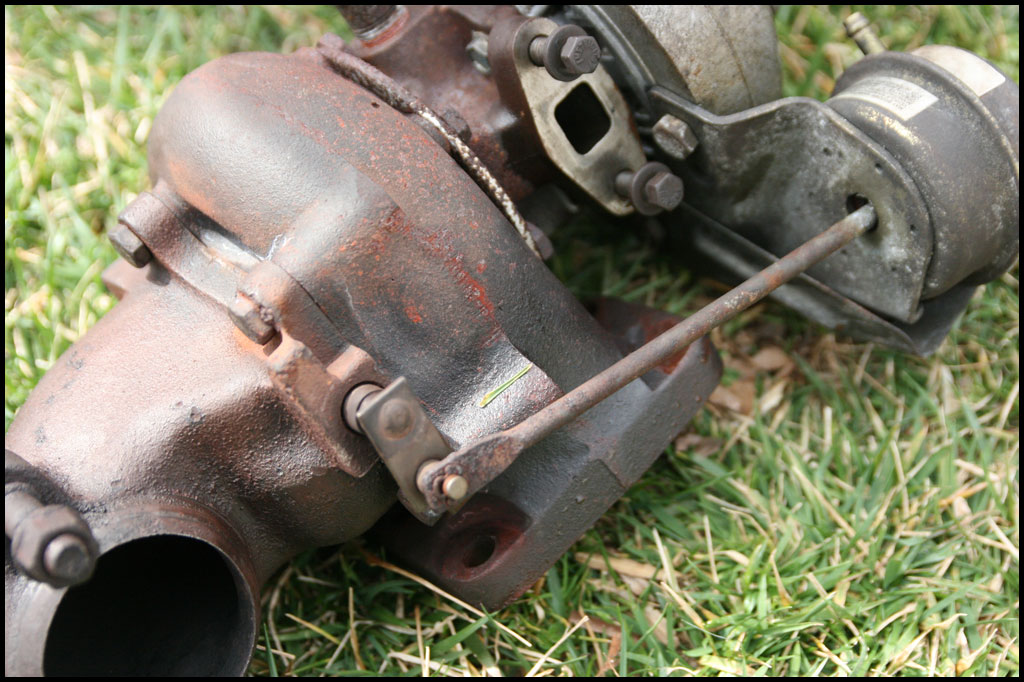
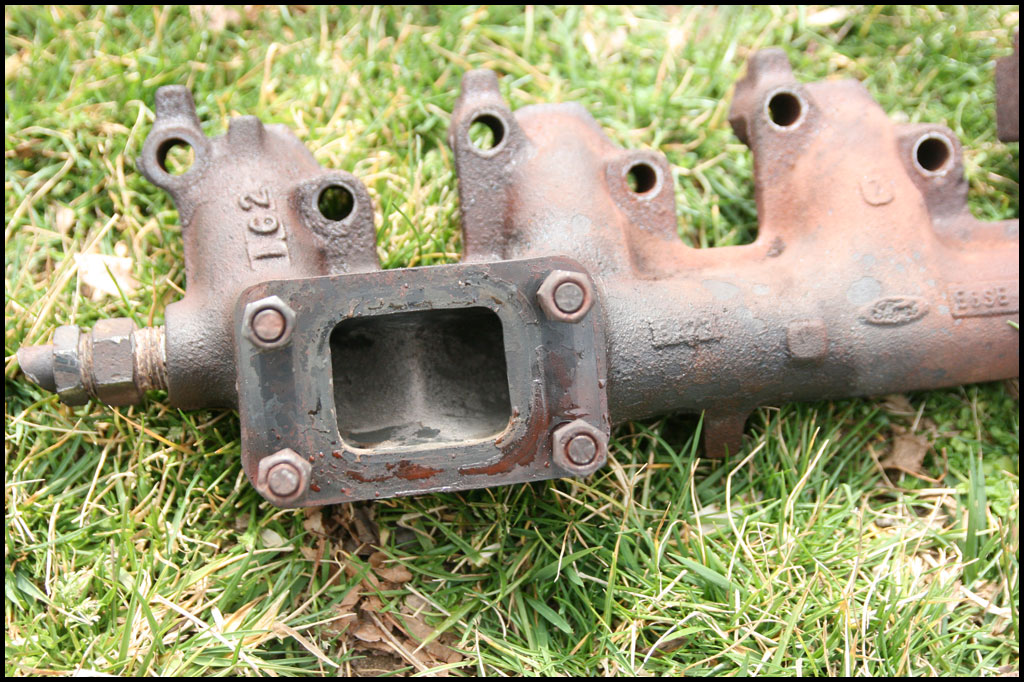
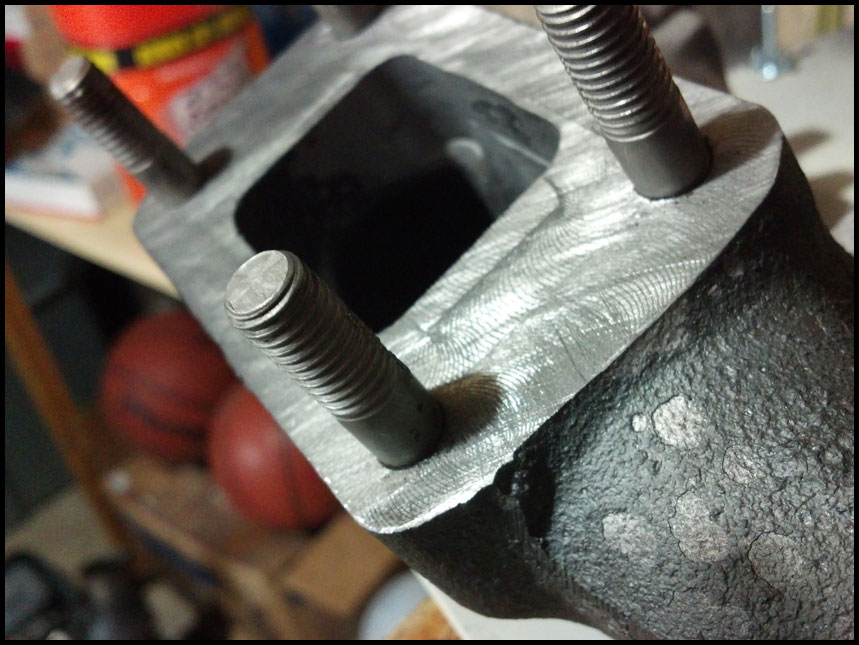
Manifold after I got it apart from the turbo. In this pic you can clearly see it’s been ported:
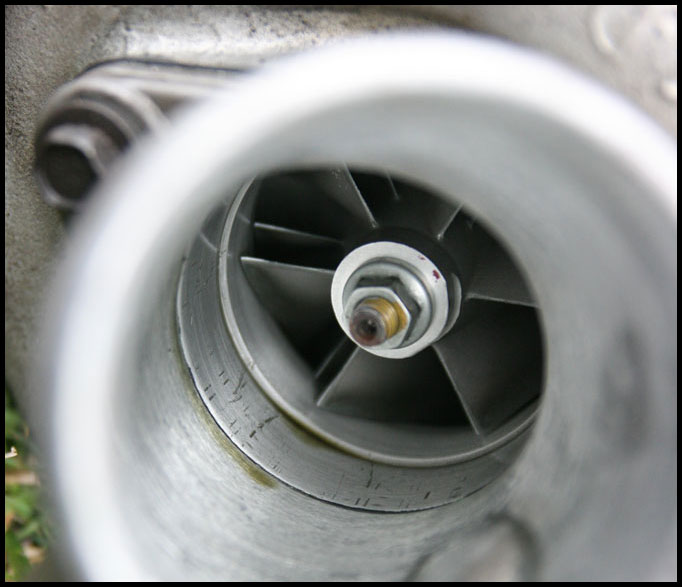
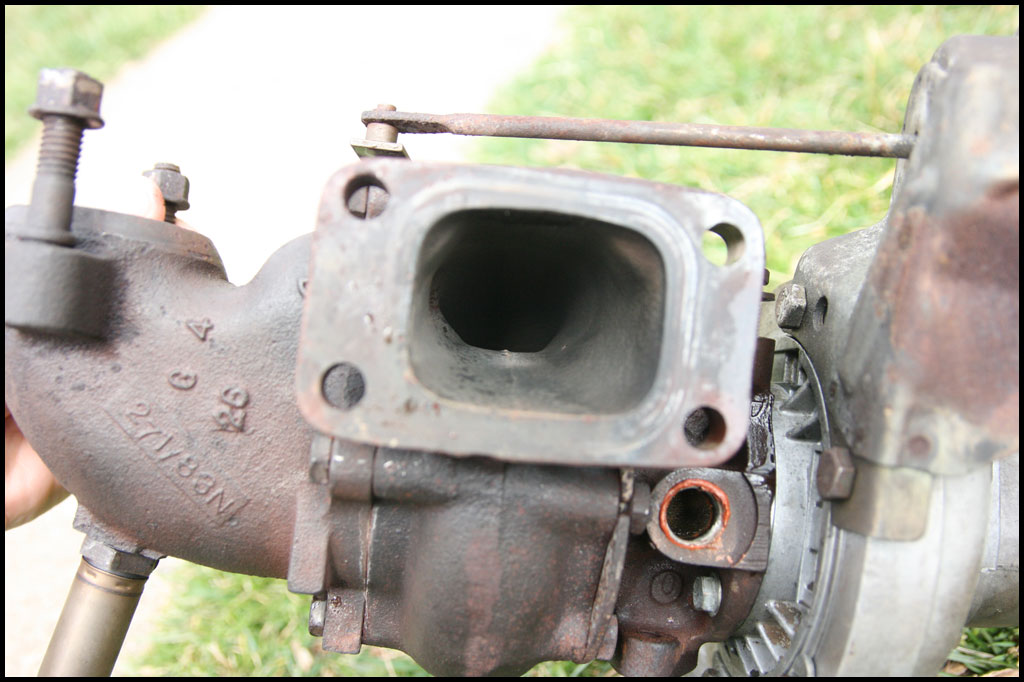
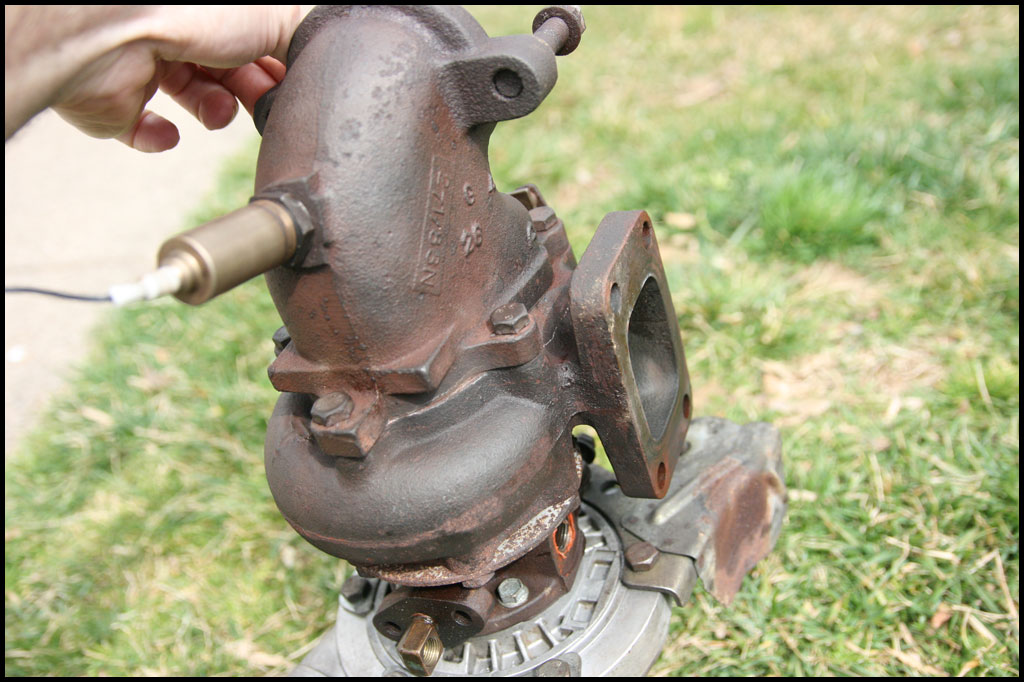
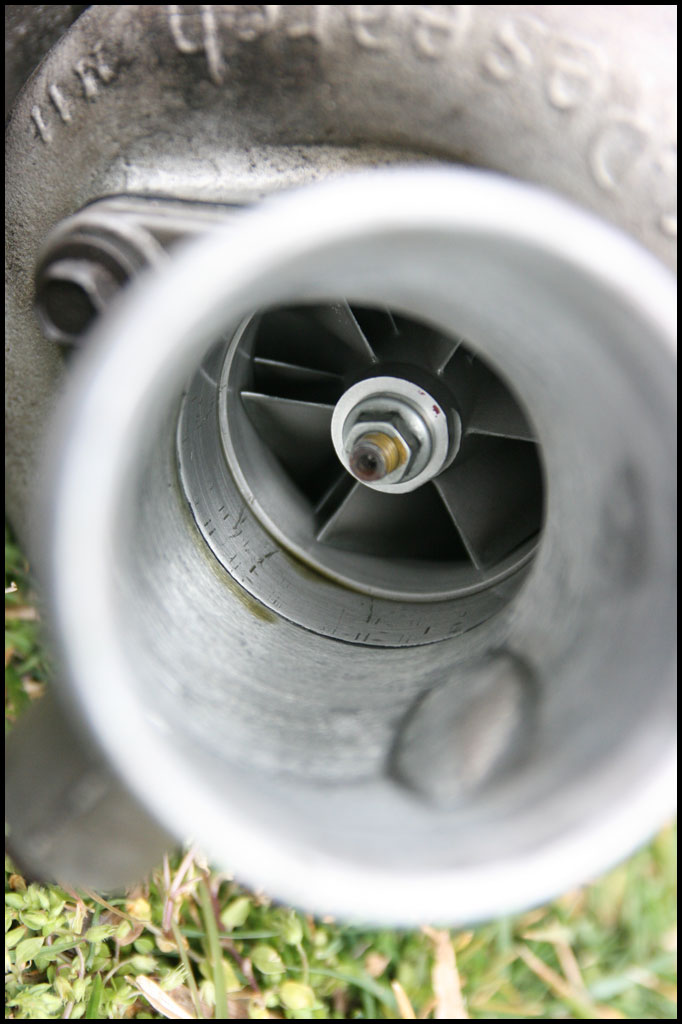
Now that everything is apart you’ll want to inspect everything to make sure all is ok. Make sure the turbo spins freely and there is no (or very minimal) shaft play – also inspect the manifold at this time too for cracks. Also inspect the turbo flange…mine was very pitted and I didn’t feel comfortable putting it back together that way thinking it would leak again. I took mine to a local machine shop to have milled flat…it only took a few minutes to do and the price was right – cheap insurance to not having to do this job again!
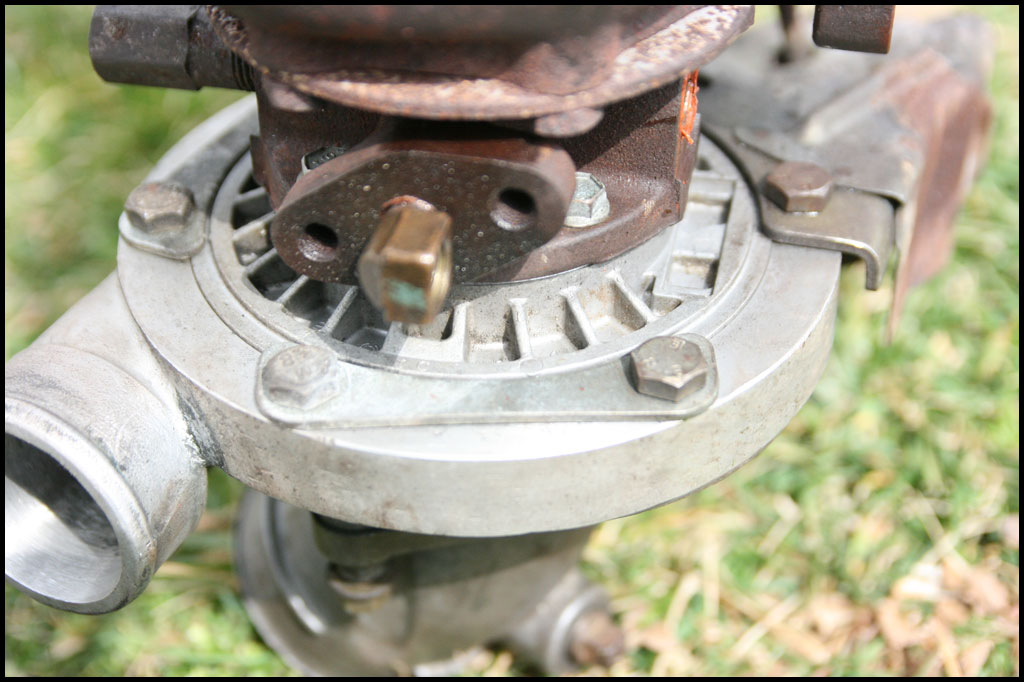
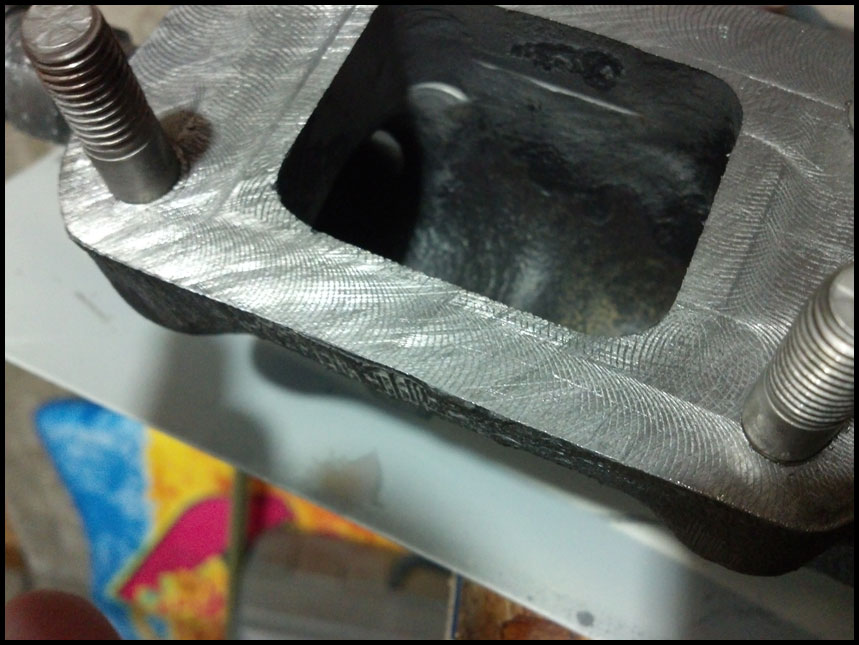
This is what it looked like after milling…those look like deep scratches but I assure you it’s perfectly smooth and flat! They did remove the studs to complete the task. They are notorious to break so be careful when trying to remove them or make sure to have a replacement set in hand…I got lucky!
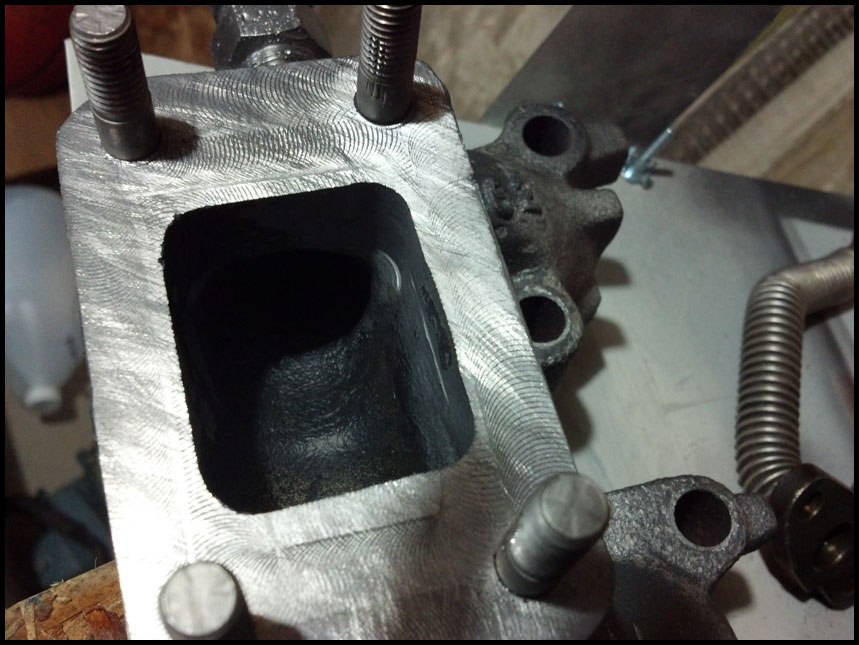
My machinist also recommended some permatex copper on the flange too – said it couldn’t hurt.
You’ll also want to make sure the flange on the turbo is smooth and flat – if not you’ll need to address that too. Mine was good.
At this point I cleaned the studs with a wire brush and cleaned the mating surfaces with break cleaner and assembled everything on the bench. I wanted to make sure the nuts were as tight as they could get – and I don’t think doing that when everything is on the car is the way to go. As mentioned before getting to those flange bolts from underneath is a nightmare.
Additionally, even though we only took a hair off the flange it was just enough to move everything in, just enough for the wastegate actuator heat shield to contact the manifold not allowing the surfaces to mount flush. I simply clearanced it to fit…wasn’t too bad – minor setback…unfortunately I don’t have pics of that…
Once you’re happy with bench assembly it’s time to put everything back. Just reverse the process. You’ll need a second set of hands to get the assembly back in – again to help take the weight and also to make sure nothing is in the way.
Once it’s “in”, have your partner wiggle the assembly while you get the support bracket bolt started from underneath…getting that bolt going will support the assembly and provide a nice pivot point to work the manifold from up top to get all the bolts started.
I also wire brushed all the bolts clean and they went back in like butter. Once they were all tight I tightened the support bracket bolt. From there I got the oil return line back into into the block…as mentioned above I used a shorty 7/8″ open ended wrench…it wasn’t that bad. I left the end off the turbo while I did so thinking it would be easier to get started…
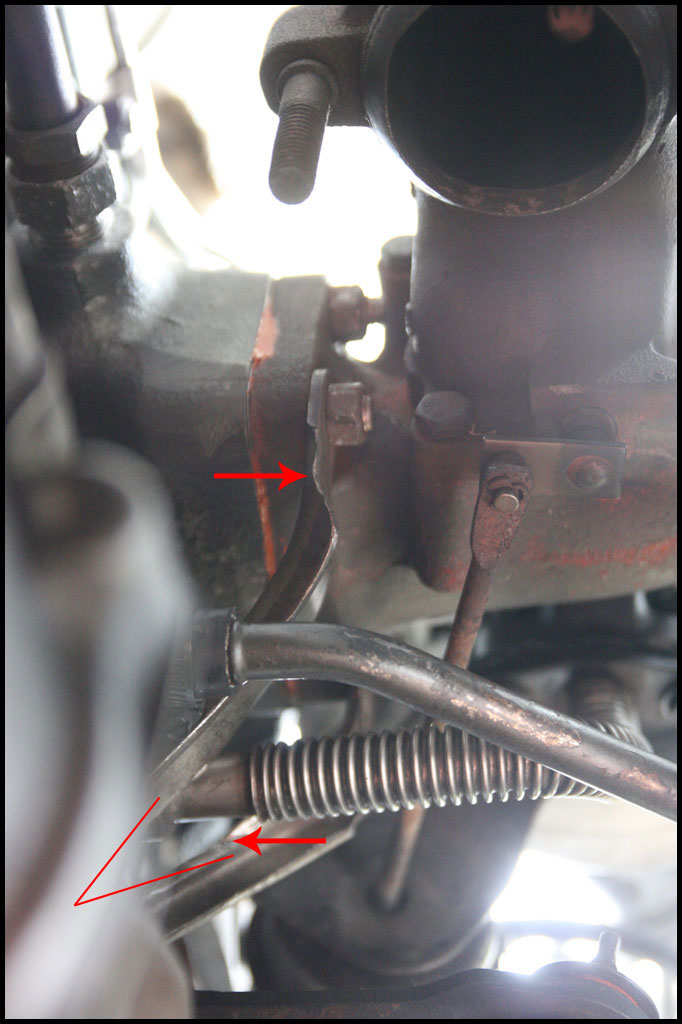
In the pic below you can see, in red, part of the bracket that I grinded. Even though everything was tight on the bench, I grinded down the support ribs up top which really get in the way – EVEN on the bench…SO, in case I have to loosen them from the bottom I’ll have a bit more room. You’ll also notice the red “V” shaped lines – I clearanced the bracket in this manner too, in order for a bit more room for getting the oil return line in…definitely helped!
After the oil return was secure on both ends I did the coolant return from below too…again easy.
I went back up top at this point and buttoned everything up there – oil and coolant feed lines, vacuum lines, turbo ground, plug wires etc etc. I did the downpipe last. Whatever works for you though.
I left the intercooler off while I started it so I could have a close look at the oil and coolant lines – of course to make sure nothing was leaking.
Here is a vid of the first start…you can clearly hear how much better it sounds w/o the leak…
I soldered the O2 wire and put the intercooler back on and I was good to go. Car ran like a dream and sounds SO much better now…
Here is a vid of a blast through the gears!
IN CONCLUSION:
Overall not a bad job to do in the driveway with basic hand tools. I was dreading it but now I know I can do it. Hopefully this helps others wanting to complete the task…feel free to contact me or comment below I’ll be glad to help or hear other tips/tricks…Thanks